The Want of Kings

Jacobite Uprising of 1702 (Trial of James Stuart - 1709)

The Trial of James Stuart


...following his capture in Ireland, the Pretender would be brought to London to stand trial for his acts. A Court of Justice would be created by a vote of the House of Commons, with the tacit support of the House of Lords. On May 16, 1709, James Stuart stood trial beneath the hammer beams of Westminster Hall where his grandfather too had once stood trial on similar charges. When presented with a chance to speak, James would, again like his grandfather, refuse to enter a plea. Instead the Pretender, in a fit of rage, would give the names of numerous individuals he had previously been in correspondence with. The outburst would shock the Court, few had expected such an act to occur. Such notables of the list would include the Viscount Bolingbroke, Sir William Wyndham, the Earl of Derwentwater, and an impressive list of others. Many of the names given would be of prominent Tories, this act would essentially cement the end of any legitimate Tory opposition to the Whigs.

After the Pretenders remarks, as was the standard legal practice in the case of an individual who refused to plead, the court would proceed as if James Stuart had pled guilty. But witnesses would still be heard by the judges for "the further and clearer satisfaction of their own judgement and consciences". Unlike his grandfather's trial James Stuart would be present to hear the evidence presented against him, but would have no opportunity to challenge their accounts. With their evidence it would be shown that the Pretender had made war on his people, had raised troops against Parliament and the rightful Sovereign, and had been a 'traitor, murderer, and public enemy to the good people of the nation'. He would therefore be sentenced to death.

On May 26, 1709, after saying a short prayer, James Stuart would be beheaded with a single stroke. The head would be exhibited, but later sewn back onto the Pretenders body for burial. Following his death Jacobitism would, for all intends and purposes, die with him both within Great Britain and Ireland. Additionally with the Pretenders List in hand the Whigs would continue their purge of Tories whom they now rightful so could call traitors. Mixed ministries would be out of the question, and the Tory party of the period would be ruined. The government, not wishing to face an election in such troubled times, passed the Septennial Act in 1710, which would extend the life of the existing Parliament and subsequent ones from three to seven years...
 
Persian Troubles (Attack of the Qajars - 1709)

Mod Event
PERSIAN WARS 2: ATTACK OF THE QAJARS

Bandar Abbas. Why did it have to be Bandar Abbas?

Fat'h Ali Shah Qajar promised that his reign would be a change from the ineffectual Sultan Hussayn Shah. He has rapidly demonstrated that this is so with a sudden invasion of Hormozgan that has left the Omani and their local allies reeling. As the Omani watch their recent conquest get bloodily torn from their grip, many are wondering what the Shah will do once he's finished here.

It's not a comforting question for his neighbors.
 
Karlist Reforms (1709)

The Karlist Reforms


-Charles of the House of Hapsburg​

Austria was a troubled state. She had suffered repeated defeats and embarrassments in recent years, chiefly at the hands of the French, though few humiliations were as potent as the Treaty of Belgrade, signed by Austria and the Sublime Porte in 1704. It had torn Transylvania from the Empire and had also been a generally humiliating defeat for Austrian armies on the field much as their later defeats against the French would be. Joseph I, who was both Archduke of Austria and the Holy Roman Emperor, proved to be ultimately unsuited for the leadership role he was expected to play by the rest of the Empire. Joseph's periodic bouts of weak health, mood swings, and lacklustre skill as a leader were greatly worrying at the Hapsburg court: a time of weakness in the Empire had already allowed the French to defeat the Grand Alliance in detail during the War of the League of Nancy, moreover, it opened the way for increasing challenge from ascendant Protestant powers such as Prussia within the empire. Joseph I would not live forever, and the Hapsburg succession in the Holy Roman Empire was less secure now than it had been for some time.

Consequently, nobles of the Hapsburg cast about in search of someone who could effectively run the empire in the absence of a strong monarch. Joseph I's skills at governance were questionable and he was prone to fits of deep melancholy in which he was nearly impossible to communicate with. He was increasingly detached from court life and even the news that his wife, Wilhelmina Amalia, was pregnant with a potential male heir to the Hapsburg throne could not stir Joseph from his malaise.

However, Joseph's brother and heir, Charles, was decidedly more vigorous and in reasonably good health. So in 1709, he was approached by a cadre of Joseph's nobles who sought to put the Austrian state back on the right track. Charles, as Joseph's brother, was a natural choice for this, and Joseph trusted him so he had thus unofficially ceded many functions of rule to him so that Charles could manage the empire in his absence. Previously, Charles had had difficulty convincing the nobility to support this as they still regarded Joseph as the preeminent figure in Vienna and would not act without his permission. Now, however, Joseph's withdrawal from active rule gave them no choice and the nobility in Vienna threw their support behind Charles.

Charles of Hapsburg inherited an Austrian state that, while still a very formidable power, was nonetheless battered in many ways. The scars of the Hungarian Rebellion had yet to heal and mistrust pervaded among the leadership of both: the Hungarians had won many privileges in the Treaty of Belgrade which were resented by the Austrian nobility, whereas the Hungarians feared that their new gains would be reversed as punishment for their rebellion against Hapsburg rule. However, while this situation seemed dire, beneath the surface, all was not lost. The Magyar nobles were generally content with the expansion of their cultural, religious, and linguistic rights, which had given them more power within their lands and also allowed them to increase their incomes by tightening the restrictions against their serfs. Moreover, the lifting of onerous restrictions on language, professions, and religious practise had had the unintended side effect of stimulating economic activity: increasing the Austrian state's tax revenues as a result. People were able to advance economically and take up trades and professions they were historically barred from, so the entire economy of Hungary benefited.

However, Charles' greatest priority in reconstituting Austria was in reforming and reorganizing the army, which had been soundly defeated in back-to-back wars with the Sublime Porte and then with the French. Charles needed to restore the army's shattered morale and return it to combat readiness. He first set about recruiting more officers to fill the ranks of those who had died in battle and restore discipline and cohesion within army units. Then he announced plans to expand the military bureaucracy by recruiting and training new clerks, quartermasters, and administrative staff to resolve supply shortages and aid in more effective distribution. Charles dismissed many incompetent officers or products of nepotism and aristocratic privilege and swiftly replaced them with talented appointees, a fair amount of whom were promoted from out of the enlisted ranks, a source of unease to some nobles but one they were ultimately willing to accept in the name of preserving Austria as a power.

Charles' greatest coup, however, was in securing the services of a talented foreign advisor to train the Austrian Army. He found it in the form of a man from an untitled Swedish noble family by the name of Johan Bråkensköld. Johan Bråkensköld was a veritable giant of a man, towering above most of his contemporaries at a formidable 6'5", he had a clean-shaven face with long brown hair and glacial blue eyes. He was covered in muscle and beyond that had an intimidating battle scar that crossed from his left cheekbone to his upper lip which he had gotten from taking a Polish cavalry sabre to the face during the Great Eastern War. His formidable size and strength were also combined with a cantankerous demeanour: Johan Bråkensköld rarely met a fight he didn't like and was known for brawling in his off-time during his tenure in the Swedish Army, including with some of his commanding officers. Many of his fellow officers and even his own men could scarcely believe that Bråkensköld was actually a real person, as his life and stories sounded more like a hero of myth than an actual Swedish soldier.

Despite his extraordinary prowess as a soldier, his lineage was not particularly favourable. Bråkensköld's family was not yet entered into the books of the Swedish nobility, and as Johan was a second son he could not expect to inherit anything of value from his family's meagre holdings. Despite his low social and financial standing, Bråkensköld had entered the Swedish Army and had a distinguished service as part of the army of Charles XII, most notably commanding men at Battle of Bardy where his regiment, despite substantial losses, had managed to drive a full-strength regiment of the Commonwealth Army into retreat, mostly because of Bråkensköld's own bold personal leadership. At some point during the war he also stopped a man from fatally shooting him by literally grabbing his pistol in hand and directing it away from his face even though it discharged in the process and blew off a portion of his left hand. Bråkensköld had returned to Sweden hailed by his men as a hero who had saved the unit. But with no war, Bråkensköld soon found himself restless and craving for adventure.

It was in this way that Johan Bråkensköld found himself in the court of the Hapsburg Emperor in 1709. Charles was a good judge of character and quickly deduced that the large, cantankerous Swede was eager for the chance to command soldiers again. However, Bråkensköld had no desire to be constrained by the strict formalities, rules, and rituals that would be expected of even a foreigner serving in the Austrian Army, but to accommodate this, Charles simply gave Bråkensköld permission to do as he pleased in the name of rebuilding Austria's army. His conditions met, and a lucrative position given to him as an advisor to the Austrian military, Johan Bråkensköld set right away to sculpting the green new regiments of the Austrian Army into a true fighting force modeled along the lines of the Swedish Army of Charles XII.

Results:
  • Joseph I's absence as ruler of Austria provokes widespread concern in the Hapsburg court.
  • Consequently, his brother Charles takes a strong leadership role behind-the-scenes and enacts reforms to strengthen the Austrian state.
  • The Treaty of Belgrade has had unexpectedly positive consequences for the relationship between the Magyar nobility and the Austrians, paving the way for greater integration between Austria and Hungary.
  • Charles quickly busies himself with military reform: focusing on reorganizing and rebuilding the shattered Austrian military from scratch and expanding both the military bureaucracy and the officer corps.
  • Charles also invites the Swedish advisor Johan Bråkensköld to train and advise Austrian soldiers, in recognition of Charles XII's brilliance in establishing Sweden as a major military power in the Baltic.
 
Treaty of Shahjahanabad (1709)

Treaty of Shahjahanabad


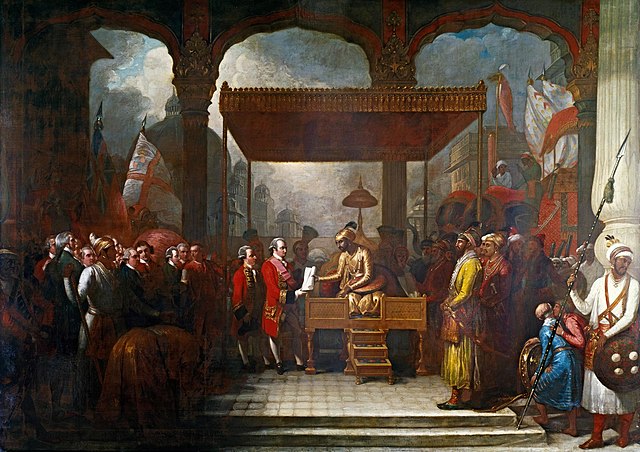
Azam Shah conveying the grant of the Diwani

-The British East India Company shall give their support to the rightful heir of the Alamgir, Emperor Azam Shah.
-The British East India Company shall grant upon the Mughal Empire contractual rights to Company military advisors.
-The British East India Company shall be granted Diwani rights, which is the right to collect taxes on behalf of the Emperor, for the regions of Bengal and the Carnatic.
-The British East India Company shall be granted an exception on all taxes, tariffs, and duties imposed by the Empire.
-The British East India Company shall be granted the privilege of leasing land at discounted rates within the Empire.

Signed by,
[X] Azam Shah, Mughal Emperor
[X] Ambassadors on behalf of the British East India Company
 
Polish-Lithuanian Commonwealth Election of 1709 (1709)

Polish-Lithuanian Commonwealth Election of 1709

Jakub Ludwik Henryk Sobieski

King Franciszek Ludwik Bourbon had originally been elected King of the Polish-Lithuanian Commonwealth in 1697. But his delay in reaching his new kingdom allowed another, Augustus of Saxony, to gain the support of several magnates and use his friendship with Austria and Russia to usurp the throne. Thus Franciszek was cheated of his crown. But a second chance appeared nearly a decade later when Augustus' actions led to his deposing at the hands of the Vilnius Confederation and Charles XII of Sweden.

Finally king Franciszek Ludwik would accomplish so very, very little. The majority of the actions that were performed during his reign were decided at the Treaty of Altranstadt, which he swore to uphold in his pacta coventa. Besides that he made a few diplomatic dealings. To the east he allowed the Ottomans to march through his land, so that they might humble the Russian bear. And to the west he agreed to stay out of the Third War of the Grand Alliance. Still Poles did fight in the form of Jaskulski's rebellion.

The most striking feature of Franciszek's reign was something out of his control entirely. Plague and frost struck Poland, while only frost hit Lithuania. These two acts of god ravaged the Commonwealth as Europe's greatest grain producer witnessed a horrible harvest that damaged the domestic economy and hurt trade as exports crumbled. King Franciszek Ludwik himself fled the capital for fear of plague and retired to an isolated manor. But there Death was upon him. Even though he escaped the plague, his syphilis remained with him. And finally it got him in the fall of 1709.

With the king dead a sejm was called to elect the next one. In total there were seventeen candidates. But only five of them could be considered serious and major ones. They were Jakub Ludwik Henryk Sobieski, Infante Francisco of Portugal, Elector Max II Emmanuel of Bavaria, Livio Odescalchi, and Charles the Duc de Berry. All five had their different backers. Sobieski had the Swedes, the Lithuanians, and some of the Poles. Francisco had the Prussians and a few Polish magnates. Max Emmanuel had a diminished faction of those who had once elected Augustus. Livio had a few close, powerful friends. And Charles had the French party.

With the table set the bidding began. Bribes and promises were traded like it was cattle auction all the way until the first vote. Then in a frenzy of voting Jakub Ludwik Henryk Sobieski became the next King of the Polish-Lithuanian Commonwealth. This had been accomplished due to the surprising withdrawal of Max Emmanuel's candidacy in Jakub's favor and the strength and bribes of his campaign stripping other candidates of their supporters. Thus Sobieski managed to win a great victory. There was some worry that the French party might attempt to usurp the election, but it was unfounded as the authorities unanimously proclaimed Sobieski the king and no one challenged his election.

Summary of Events
  • Franciszek Ludwik dies​
  • Election sejm called​
  • Sejm elects Sobieski​
 
Moroccan-Bambaran War (A Black Flood - 1709)

Moroccan-Bambaran War
A Black Flood

Battle of Segou

Ismael Moulay had taken Morocco from a decentralized, weak state into a power to be reckoned with. Under his leadership Morocco was solidly unified and centralized, with the tribesmen's backs being broken and all pretenders being defeated. But he was not just victorious within Morocco, as he marched against the British, the Spanish, and the Portuguese and conquered many of their coastal forts. Ismael Moulay also won independence from the Ottoman Empire and nearly conquered the regency. And recently he reestablished Moroccan control over Timbuktu.

Timbuktu was finally once more in Moroccan hands. But it was just the beginning of a planned reconquest of the Niger River Valley, which Morocco had first done in 1591. Hence a large segment of the Black Guard was gathered for the expedition. This army was far larger than the army that had originally captured the region. The size of this army was excessive when considering that Bambara was not as powerful and threatening as the Songhai Empire had been. But Ismael Moulay did not want to take chances and also wanted to safe guard the region against the Tuaregs.

The army after assembling and supplying at Chenguit the army began its crossing. Aided by tens of thousands of camels and pack horses the large army made its way across the routes of the Trans Saharan tradeway to reach Timbuktu. The vast size of the expedition made it an expensive one. After a long, prodigious march they finally arrived at the pashalik where Er-Riffi took command of the army. He shortly rested it while he resupplied it as he could. And after several days he departed with the bulk of the army, leaving a significant garrison at Timbuktu. Besides protecting the city the garrison was also tasked with building a riverine fleet.

The Black Guard marched eastward first. There the army surrounded the city of Gao and elicited from its governor a capitulation. With that the eastern front was secured. Thus after establishing a sufficient garrison to man Gao, Er-Riffi marched westward. Soon the army descended upon Mopti and Djenne. Both of which fell after a short bombardment and show of strength. Hence the middle Niger was under Moroccan control. By this time the garrison at Timbuktu had sailed down a few of the newly built river gunboats. Which were not much, but were at least more than the Bambara had.

Finally the Black Guard moved against the capital of the decentralized Bambara Empire, Segou. There for once the Moroccans encountered true resistance. The King had seen no avail against the Moroccans and was prepared to surrender to them. But before he could the Tondions of the city, led by Mamary Coulibaly launched a coup against the king. This force with the support of the people and some of the chiefs dispatched of the king. Then Mamary Coulibaly, the new king, proudly refused Er-Riffi's demand for surrender.

The next many days would witness a brutal bombardment from the siegeworks of the Black Guard. This bombardment soon made way against the outdated, crumbling defenses of Segou. And shortly after a week of bombardment the walls gave way. With that Er-Riffi ordered a massive frontal assault against the defenses of Segou. This several thousand man strong attack overwhelmed the defenders and flooded into the city. They dismissed the defenders and seized the city within hours, slaughtering mnay of the Bambaran soldiers, among them Coulibaly. With Segou conquered, all that remained Bla. And it surrendered shortly afterwards. Thus the Bambara Empire was no more.

The conquest of the Bambara empire came without difficulty for Morocco. The reasons for it were many, but simply. They sent an overwhelming force, perhaps unnecessarily, that outdid the Bambara at every step. Further the Bambara empire was vastly decentralized, so the defense of it was disorganized and disunited. Finally the conditions of the Bambara were poor, whereas the Black Guard was a modern, professional army. The implications of this conquest are the reestablishment of Moroccan dominance on the Niger River. But it also means that Morocco will have dedicate and pour much resources into holding the Niger River Valley. But the vast amounts of salt in the region, if successfully utilized will be able to provide some amounts of money. But no matter waht the future is filled with possibilities, most interesting.

Summary of Events​
  • Black Guard army sent​
  • Moroccan Army reached Timbuktu intact​
  • Morroccan Army conquers Gao​
  • Djenne and Mopti fall to Morocco​
  • Segou witnesses coup​
  • Segou falls to Morocco​
  • Bla surrenders to Morocco​
  • Bambara Empire conquered by Morocco​
 
Second Time of Troubles (Purgatory - 1709/1710)

Second Time of Troubles
Purgatory

Don Cossacks attacking Russian soldiers

In 1708 the Tsar Peter the Mad was overthrown and killed after years of disastrous war. His opponents, a coalition of conservatives had replaced him with his son, Alexei. The Tsar Alexei was greeted with rejoicing around the country as the Patriach claimed that Alexei's ascension would please God and bring an end to this bad winter. Meanwhile his political supporters paraded Alexei's quick end to the war with the Ottomans and their allies among the Khanates. Russia was finally going to have peace and quiet.

Finally the harsh brutal winter came to an end. The supporters of Alexei proclaimed this God blessing Alexei's reign. Thus Alexei's rule continued swimmingly. And then in an attempt to further this popularity the Tsar ordered that the gates of Moscow be opened. He invited the dispersed Muscovites to return home to receive food and shelter. And so tens of thousands of Muscovites exited from Yaroslav and Veliky Novgorod to return home in hopes of rebuilding their lives and starting anew. But those hopes did not last long.

In Russia the devastation of war had resulted in severe damage to Russian agriculture. The Russian agricultural region of Ukraine was lost entirely. And two other Russian farming regions had been purposely ravaged by the Ottomans to starve the Russians out, if they had not surrendered. Only two fifths of Russia's agriculture was untouched by war. But the cruel winter slammed those regions hard. The harvests and crops that had been intended to feed much of the nation were destroyed by a bad harvest year.

With Russian agricultural ruined the Russians had to find their food elsewhere. This meant relying even more on the grain that came through Sweden and Arkangelsk. But the prices had skyrocketed due to the famine across Europe and Poland's plague and winter having prevented their harvests from being of much use. Thus many Russians struggled to afford food and starved. Most were forced to survive off meager meals and poached food. But many hundreds of thousands failed to even gather that much food and instead starved to death.

In these stark conditions the open gates of Moscow and promise of food caused a flight from lesser, worse off cities towards the capital. Soon Moscow was overflowing with people and many were living in the streets. Alexei's government at first vainly attempted to feed these people, but in the process emptied the small treasury that there was, save for the money reserved to pay the Ottomans their indemnity. But worse with several hundreds of thousands in crammed in the capital, unsanitary conditions were bound to take hold. Soon several diseases broke out and even the plague hit the city when a merchant from Poland brought it with him.

With disease and famine in the very capital of the Tsardom of Russia absolute chaos broke loose. Moscow became a cesspool of crime and strife. Meanwhile the khanates unleashed their raiders unto Russia again to seize advantage of its weakness and enrich themselves in the process. And in the south the Don Cossacks chose to take their own path as they rose up and threw out the Russian soldiers. Under these conditions and with all these crisises the central government of Russia collapsed. In its stead banditry seized the countryside, militias and governors rule towns and cities, foreign merchants dominated the economy, and raiders of all colors made easy pickings off Russia's population.

With Russia engulfed in chaos many looked to the Tsar Alexei for hope. But Tsar Alexei was reluctant to be Tsar and knew little in the way of governing. Instead he deferred to his advisers for answers. However in a time of crisis like the one Russia was in one's ministers tend to differ widely. And it was no different for Alexei. All his ministers offered different opinions and answers to Russia's calamities. And this fractious situation deteriorated in arguments and insults being thrown across the council chambers for hours upon hours. Alexei was simply overwhelmed.

Overcome by pressure Alexei demanded his ministers cease their bickering. He commanded them to prepare a carriage for him, so that he might make a short trip into the countryside where he could get his head together. He told them that he would return soon after finding which of the solutions his ministers offered was the one that would save Russia. His ministers though displeased that the Tsar did not make an immediate decision obliged him in hopes that their obedience would compel him to choose their solution.

However a few days into his ride it turned from a peaceful ride into the countryside into a flight northward. With all haste the Tsar Alexei rushed to the Swedish border where he hoped to find refugee from the hardships of leading Russia. But when a loyal commander at a town recognized the Tsar this furtive escape attempt became a national escapade. The commander was bribed into letting the Tsar pass however he then sold the information of the Tsar's escape to his ministers for another price. Those ministers realizing they had been juked united in an effort to stop the Tsar and return him to Moscow, before further chaos broke loose. But it was already too late.

News spread of the Tsar's abandonment of Russia. This collapsed much of the remaining support for Alexei. But it also collapsed support for his governing ministers meaning that they could not simply dump Alexei and choose another to lead Russia, but instead they were bound to Alexei's fate. And the only way in which they could retain their positions of power was to make sure that Alexei remained Tsar. So even though the people turned against the Tsar his ministers were fored to continue to support his claim to the Tsardom.


Then the disaster deepened. It was early October when Alexei's flight began. But as it turned to mid October the flight came to a halt as the roads vanished into slick mud. Under these conditions the ministers' men, struggling, closed the gap between themselves and the Tsar. Under threat of being dragged back to Moscow Alexei attempted to ride off by himself into the mud and rain to escape. Yet it was in vain as after a few more days the ministers' soldiers captured the tsar and started back off towards Moscow.

Yet the recovery did not end the troubles. Quickly rumors spread that the tsar had escaped or died trying and that the man who was returned to Moscow was an imposter. Others who still supported the Tsar called out that his ministers were evil and had misled him, and that Alexei was not running from the Russians but form his council. Worse yet religious leaders condemned Alexei as devilspawn just like his father and proclaimed his ministers to be demons. Non matter which story one believed they al negatively depicted the government in Moscow.

With Alexei thoroughly discredited a new claimant would arise. In Novgorod Catherine Ivanovna and a major Russian powerbroker, Vasiliy Gargarin united forces and formed a strategic, political alliance. And to cement this alliance Vasiliy broke his betrothal to Maria Volkova and Catherine broke her betrothal to Adolph Frederick of Mecklenburg Strelitz, instead they united themselves in marriage. Thus a strong claimant and a major Russian political force came together to mount a significant challenge Alexei and his ministers' government in Moscow.

Over the winter Catherine and Gargarin gathered their forces. They assembled an army out of their private forces, deserters from the Russian army, and hired mercenaries. They also focused on consolidating control over Novgorod. This involved some limited military operations against the few Petrovich holdouts in the north. Such as Ivanograd which was seized in a short siege. By the beginning of the campaign season the Ivanovna faction had secured the Novgorod region and with it the most important border crossings with Sweden and the grain trade that revolved around them.

As soon as the weather permitted (May) war Gargarin personally led an army against Arkangelsk. In a swift march this army reached the only port of Russia. There they were met with a stanch, but small garrison of soldiers. After surrounding the city Gargarin bombarded it for a few weeks before its defenses gave way. And once they had he ordered the assault. And in a brazen action the Ivanovnas recklessly attacked Arkangelsk. But through sheer numbers they overwhelmed the defenders and seized the port.

With the north more or less in Ivanovna hands the Ivanovnas decided to make a bold move on Moscow. After gathering all their might the army of Gargarin marched down the road towards Moscow. There the Petrovich faction also aimed to gather all its might in hopes of retaining the city. But immediately the Petrovich army ran into problems. The Russian army had diminished vastly seen the peace with the Ottomans. Amidst the chaos, decentralized state of Russia, lack of pay, etc. tens of thousands of soldiers had deserted. Most of them had returned to their homes to defend them against the continual raids, others now served the Ivanovnas. Now all the Petrovich faction had was a weak, insufficient army to defend itself.

The weakness of the Petrovich faction began obvious as the army of Gargarin approached Moscow. Several of Alexei's ministers abandoned Russia and fled westward and northward. The few ones who were determined to stay retreated to the Kremlin with their army and kept Alexei imprisoned with them. The rest of the city was abandoned due to the chaotic state of being it was in. And it proved to be a very wise decision when the citizens of Mowcow gladly opened the gates to Gargarin and his army.

Nonetheless the remnants of the Petrovich faction believed they could hold the Kremlin. But this was just a dream of lunacy similar to those suffered by Peter the Mad. Gargarin's army easily outnumbered the Petrovich army and had the weapons to seize the Kremlin. But more significantly the situation within the Kremlin was barely better than it was outside of it as there were still thousands of citizens of uncertain loyalty and in fact the army itself would not have been counted on in better times, but these were not better times.

Over the course of the next several days Gargarin's army assaulted and invaded the Kremlin. Attacking the Kremlin from several points and bribing some gates open the Ivanovna force was able to secure entry to the Kremlin. Once within they started a vicious battle to vanquish the Petroviches. For days the battle raged on through the streets and buildings of the Kremlin as the Petroviches made a surprisingly strong attempt to defeat Gargarin's army. But it was not enough as Gargarin had conquered the Kremlin before the week's end. However one loyal minister had escaped with Alexei to Smolensk.

With Moscow captured and raputitsa approaching Gargarin decided against continued campaigning. Instead he invited his wife to make a triumphal march into the city. Which she soon did. Riding atop a horse for all the people to see her in her glory Catherine exposed herself to Moscow. The decrepit city welcomed her with shouts and cheers. But the poor conditions she witnessed were enough to explain Alexei's escape attempt. It was obvious to her that Moscow could be nothing more than a symbolic capital for the time being. Thus after a brief jubilant stay in Moscow she returned to Novgorod from where she ruled her parts of Russia.

To the east Kazan was once more conquered by the Kazan Tatars. They surrounded the city and blockaded it from all traffic and supplies. They then starved the city out for a few months until it capitulated to the Kazan Tatars. However this time the Kazan Tatars did not want to lose the city. Thus they resorted to an extremely violent and genocidal method to ensure the city's retention. Every man and boy was gathered and massacred by the Kazan Tatars. The women and girls were raped and distributed among the men. And the city was flooded with Tatar soldiers and their families so that the city would become Tatar populated once more.

The Second Time of Troubles emerged due to the combination of bad winter, bad harvests, and great devastation from war. And when the answer to these problems was weak, ineffectual governance and even the flight of a Tsar they were all exacerbated. Further so as Russia's neighbors took advantage of it and raided it whether economically like the Swedes did or actually like the Khanates did. With this terrible situation Tsar Alexei's support collapsed and Catherine Ivanovna and Vasiliy Gargarin were able to take control of much of Russia.

The implications of the break out of chaos and havoc in Russia are great and terrible. Russia is certainly being set back significantly in means of economy, military, and demographics. And the collapse of central authority is opening up many opportunities for those neighbors who have yet to assault Russia like the Swedes, Poles, and Zaporozhians. Meanwhile it also means that the Don Cossacks and the Kazan Tatars might be able to make some lasting gains against Russia. Further it means that Sweden, the Polish-Lithuanian Commonwealth, and Ottoman Empire have little to fear from Russia for the foreseeable future.

Summary of Events
  • Alexei credited with end of winter​
  • Alexei opens gates of Moscow​
  • Bad harvests devastate Russia​
  • Moscow becomes overcrowded and disease and famine ravage the city​
  • Don Cossacks successfully rebel​
  • Alexei attempts and fails to flee Russia​
  • Flight collapses Alexei's credibility​
  • Ivanovna faction rises up​
  • Ivanovna faction secures north​
  • Alexei's supporters splinter​
  • Ivanovna faction takes Moscow​
  • Alexei's supporters gather at Smolensk​
  • Kazan retaken by Kazan Tatars​
  • Genocide in Kazan​
  • Russia lacks central authority​
  • Banditry, famine, disease, etc. afflict Russia​
 
Mughal Succession War of 1709 (Family Business - 1709/1710)

Mughal Succession War of 1709
Family Business

Bahadur Shah at Battle of Gurugram

With Aurangzeb's death his favorite son Muhammad Azzam Shah was supposed to succeed without question. However two major questions arrived in the forms of his brothers, Bahadur Shah and Muhammad Kam Bakhsh. Both of his brothers offered Azzam Shah peace, but it would require relinquishing control over a whole Mughal Empire. And Muhammad Azzam Shah remembering his father's last wish refused the offers of his brothers and instead strived to preserve the entirety of the Mughal Empire. Thus the war of succession began.​
The war broke out first in Bengal. There the longstanding rivalry between Azim-ush-Shan and Quli Khan became a pivotal part of the war. With Azim having obviously backed his father, Quli Khan sided with Azzam Shah. With that came orders to block Azim from exiting Bengal and joining up with his father. Thus Quli Khan assembled and raised a formidable army of Bengalis to oppose Azim's egress. And though he was going to have to wait on reinforcements from Agra he was soon joined by reinforcements from the British East India Company.

In a series of maneuvers Quli Khan outmarched Azim and forced Azim to acknowledge that battle was a necessary step to escaping Bengal. Thus he chose to march against the camp of Quli Khan at Kudra. After a morning march Azim's army reached Quli Khan's camp. However Azim refused the advice of his lieutenants who suggested he rest his army and engage the next day. Instead Azim saw that Quli Khan had not drawn up his army and was thus vulnerable. His initial attack succeeded in defeating Quli Khan's pickets and the outer camp. But this assault was blunted when they ran into the hardened Company soldiers. Quli Khan then used the time bought for him by the Company to regroup his army. Andonce he had he launched a full blown counterattack that drove Azim from the field and made for a decisive victory.

After Kudra Quli Khan gave Azim's army chase. Throughout the chase Azim attempted to rebuke Quli Khan's army or at least slow it down. Thus over the course of the chase there was a series of brief, short engagements and rear guard actions fought between the two armies. However Quli Khan won the majority of these. Also Quli Khan was able to replace his losses and augment his army with the reinforcements that arrived from Agra, but Azim though wealthy in coin was not in numbers, and since the region's soldiers had already all been recruited he could not replenish his numbers.

Finally at Azimabad Azim-ush-Shan could retreat no more, for to abandon his own city would be far too humiliating. Thus Azim-ush-Shan deployed his army on the hills to the south of Azimabad. Quli Khan arrived some days later and chose to rest his army and postpone battle till the next day due to the extreme heat in Azimabad. In the morning a fierce artillery battle broke loose between the two armies. Of which Quli Khan's army fared better due to its increased amount of cannon and its supplement of European cannon from the Company. An hour later Quli Khan ordered the attack and unleashed his army on Azim's. As the two armies collided in a battle of cold steel both sides struggled int he heat. But when Quli Khan's elephant charge broke Azim's right the battle turned in Quli Khan's favor. Azim personally responded by leding his own elephants into the battle. But a lucky shot from a Companyman killed Azim. And with the death of their prince the army of Azim collapsed and fled. Thus ending the war of succession in Bengal.

To the west Azim's father, Bahadur Shah I was marching from Kabul towards Agra. Bahadur gathered an army of Mughal soldiers, Rajputs, and even Sikhs to challenge Muhammad Azzam Shah for the throne. After marching this army across Punjab Bahadur came upon his brother's army near Agra. Muhammad Azzam Shah had used the treasury of Agra and his position as crown prince to raise a large army, even larger than his Bahadur's. However having sent part of his army eastward to Bengal, the army Azzam Shah had to oppose his brother was actually smaller than his brother's. Even with Muhammd Azzam Shah's numerical disadvantage he felt confident about his victory against Badahur. He and his generals had chosen the battlefield upon which they would fight his brother, his soldiers were of good quality, and of course Allah favored him.

The two brothers would come to battle at Gurugaram. There Bahadur came upon Azzam's army. However battle was not joined yet as both armies chose to rest through the night and fight instead in the morning. When morning did come the two armies' artillery faced off against one another while the infantry and cavalry formed up. Once they had Bahadur ordered the assault first intending to overwhelm Azzam's army. But this tactic fell through when Zulfiqar Khan and Bidar Bakht held strong against the press of Bahadur's army. Instead of the overrunning of Azzam's army that Bahadur foresaw his army was vastly bloodied as it tried to smash through Azzam's army. And then when Bahadur tried to launch an elephant assault is elephants panicked and wrought havoc on his own army. With chaos in the rear of Bahadur's army Bidar Bakht launched a counterattack that shattered the Rajputs. With that Azzam thought he would achieve a complete victory and end Bahadur's challenge. But a torrential downpour allowed Bahadur to escape with his mauled army. Among the dead that he left behind

Following the defeat at Gurugaram Bahadur retreated towards Punjab. There Bahadur wanted to get the full support of Guru Gobind Singh and his Sikh army. But Gobind Singh refused due to the incident of the execution of a Sikh soldier by Bahadur for being a Sikh infidel. Also there were rumors that Bahadur had not been sincere in his promises with Gobind Singh. Thus the Guru refused to give aid or refugee to Bahadur and instead stayed out of the succession crisis. Something which Muhammad Azzam Shah allowed, because he did not need more enemies at the time.

Unable to find help in Punjab Bahadur continued to retreat towards Lahore. There as he was crossing the river Azzam's vanguard surprised him. Bidar Bakht had been slowly gaining ground on Bahadur through forced marches. Finally through a night march and continued morning march Bidar Bakht caught up to Bahadur's army. Upon reaching Lahore Bidar Bakht launched an assault of everything he had. The shock of the charge succeeded in dealing significant damage to Bahadur's army before it was driven off.

Having suffered further defeat at Lahore Bahadur began to lose more and more support as some of commanders deserted and joined the army of Azzam. Eventually the two brothers would meet once more in the far off Saidpur. There Bahadur having failed to convince Azzam to give his a province to rule chose to make a stand in hope of a magical victory. But on the foothills of Saidpur there was little magic. The cannon of Azzam's army hammered Bahadur's army hard before launching its attack. Once it had the two armies fiercely fought over the field. Then through sheer luck a cannonball decapitated Bahadur Shah himself. The sight was considered a sign and led to the collapse and mass surrender of Bahadur's army.

With Bahadur and Azim defeated Azzam turned to his other brother Kam Bakhsh. During the time in which Azzam was busy with Bahadur Kam Bakhsh had crowned himself at Bijapur and conquered much of Maharashtra and Hyderabad. However he was stopped at Aurangabad where Quli Khan had marched to after defeating Azim in Bengal. After that Kam Bakhsh and Quli Khan haad settled into an uneasy stalemate that lasted into mid 1710 when Azzam's army was able to join Quli Khan's army at Aurangabad. Thus giving Azzam a decisive advantage over his brother.

In the months that followed Kam Bakhsh and Azzam fought several lesser battles as Kam Bakhsh sought to secure an advantage that might hand him victory over is brother. While Azzam wanted to force Kam Bakhsh into a full battle where Azzam could secure a complete victory. The two armies marched across southern India as Kam Bakhsh lost Maharastra and then he lost Bijapur, is capital. Finally the two brothers moved towards confrontation as they approached the city of Hyderabad. Eventually it came down to the Battle of Sedam.

There in the heat of summer the two armies met. On that field Kam Bakhsh formed his lines and prepared to met the onslaught that Azzam had in store for him. And his brother Azzam obliged him with a frontal assault. This attack went against the advice of Azzam's generals. And that advice was for reason when Azzam's army suffered many casualties, more than the enemy. However the battle did breakt he organization of Kam Bakhsh's army and sent Azzam's brother into exile as he fled the Mughal Empire for friendly ground. With that the succession came to an end.

Muhammad Azzam Shah's victory resulted from several things. First most being crown prince did Azzam Shah many favors as he had the treasury at his disposlal to raise an army and also the legitimacy to gain many allies. After that his competent commanders in the form of Quli Khan, Zulfiqar Khan, and Bidar Bakht were extremely important. Also the isolation of Azim-ush-Shan to Bengal was a huge factor as the troops and money he raised never reached his father. In fact the money was used by Quli Khan to raise more troops. Also Bahadur's alienation of the Sikhs denied him a valuable ally.

The implications of Muhammad Azzam Shah's victory are not so many as one would believe. The Mughal Empire faces many troubles like poor interreligious relationships, economic difficulties, and more. But all of them were already afflicting the Mughal Empire before Muhammad Azzam Shah won and they would have still afflicted the empire if one of the other claimants had won. However Azzam's victory presents some important implications. His heir Bidar Bakht is known for his religious liberalism, military genius, and administrative skills. He is also supported by the intelligible Grand Vizier Zulfiqar Khan. Thus Azzam is more prepared for the challenges to come then his brothers were.

Summary of Events
  • Quli Khan defeats Azim's escape form Bengal at Kudra​
  • Quli Khan chases Azim​
  • Quli Khan ends war in Bengal at Azimabad​
  • Bahadur Shah is defeated at Gurugaram​
  • Bahadur retreats into Punjab​
  • Bahadur is rejected by Sikhs​
  • Bahadur suffers losses while crossing Indus​
  • Bahadur is defeated at Saidpur​
  • Kam Bakhsh conquered much of southern India​
  • Kam Bakhsh's path blocked at Aurangabad​
  • Kam Bakhsh loses much of his land​
  • Kam Bakhsh is defeated at Sedam​
  • Mughal Empire unified under Azzam​
 
Maratha Succession War (Distractions - 1709/1710)

Maratha Succession War
Distractions

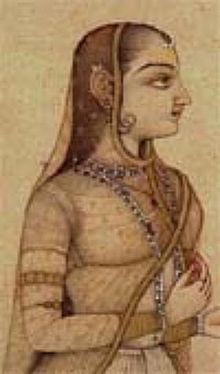
Tarabai

With the Mughals in a succession war one would expect the Marathas to take advantage of the disunity. However they did not as they had to deal with their own disunity. The Mughals knowing that the Marathas would try attack the Mughal Empire and retake lost lands released a claimant to the Maratha throne, Shahu, to spark a succession war within the Maratha Empire. This way the Marathas would be distracted with their own civil war instead of interfering with the Mughal one. Further Shahu's mother was imprisoned by the Mughals to make sure he did not try anything after taking the Maratha throne.

Upon arriving in the Maratha Empire Shahu's legitimacy was denied by the regent Tarabai. She called him an impostor sent by the Mughals to cause chaos and distract the Marathas. She quickly dispatched an army to destroy the small force that Shahu had gathered. However the leader of this army Dhanaji Jadhav was not so willing to easily dismiss a claimant to the Maratha throne as Tarabai was. Instead he sent chose to send a trusted lieutenant to discover the validity of Shahu's claim to the Maratha Empire.

This lieutenant, Balaji Vishwanath, spent hours with Shahu questioning him on everything Maratha and everything about family. And in the end he came to the conclusion that Shahu was no impostor but the true son of Sambhaji. And that is exactly what he reported to Dhanaji Jadhav. Dhanaji Jadhav then decided that instead of arresting and executing Shahu that he would proclaim him the rightful chhatrapti of the Maratha Empire. Further Dhanaji Jadhav proclaimed is loyalty to Shahu and his neverending support for Shahu's claim.

With that it was expected that Tarabai's regency would soon fall. But bolstered by money from the French East India Company and the Dutch East India Company she was able to raise more troops and curry the favor of more leader. Thus she recovered from the loss of Dhanaji Jadhav's army and raised a new one to prevent the fall of her regency. However while she did this she lost the northern portion oft he country to Dhanaji Jadhav's swift actions. This forced southward towards Goa. Near which the two armies would clash.

In the Battle of Amboli the armies of the two claimants clashed. There on those hills Tarabai's famed cavalry actions were useless due to the broken ground. Instead she was forced to use mainly her infantry to attack Dhanaji Jadhav's army. But this assault of newly raised soldiers fell apart when Jadhav's shock troopers counterattacked it and mauled it. Then Jadhav continued the attack with an assault on Tarabai's army. And this unlike Tarabai's attack met more success and successfully drove Tarabai from the field.

In the aftermath of Tarabai's defeat at Amboli she decided to fight only on open ground so that she could utilize her cavalry. However Dhanaji Jadhav was familiar with Tarabai's tactics and avoided those battles. Meanwhile Tarabai also shocked by the poor performance of her army at Amboli focused on training it and produced a hardened force that did not break so easily. For weeks the two armies marched across the Maratha Empire only fighting skirmishes and small battles. Until monssoon season put an end to campaigning. And afterwards the same method of warfare carreied the war into 1710.

Finally the two armies met at Dittur. At Dittur Tarabai wanted to make use of her cavalry and her generally improved army. Meanwhile Dhanaji Jadhav wanted to break Tarabai's army and open the road to Hubli. Tarabai started the battle with a broad stroke of her cavalry towards Jadhav's flank. His infantry succeeded in driving off the cavalry, but suffered greatly in the process. Tarabai then threw her infantry on the weakened flank intending to fold Jadhav's army. However jadhav's reserves flooded the flank and threw back Tarabai's attack. Yet Jadhav's own attack faltered as well. Nonetheless Tarabai conceded the field and withdrew to Hubli.

In the aftermath of Dittur the war resumed to its previous state. Jadhav had not secured the victory he needed at Dittur to seize Hubli, so he instead continued to try and produce a tactically favorable situation in which he could destroy Tarabai's army. And Tarabai looked for the same thing. But those two scenarios do not often match up. And with neither side having much to gain from battle and far too much to lose all tat was fought were skirmishes. This continued until monsoon season when both sides retired.

The failure of the Maratha Succession War to produce a very decisive battle that decides the war results from a few things. First off Tarabai and Jadhav are both experienced and smart generals who are doing everything to avoid mistakes. They of course already have at Amboli and at Dittur. Meanwhile they are both cautious of one another because thouse Jadhav has the better, more experienced army Tarabi has the better cavalry and has European guns. However with the war dragging on the pressure to do something decisive will increase. The implication of the Maratha Succession war is great. The succession war has prevented the Marathas from taking advantage of the temporary Mughal weakness. Thus the Mughal plan to use Shahu as a distraction succeed.

Summary of Events
  • Shahu starts rebellion​
  • Jadhav joined Shahu​
  • Tarabai raises new army​
  • Jadhav defeats Tarabai at Amboli​
  • Indecisive battle at Dittur​
  • War of maneuver develops​
 
Colonization of Fernando Pó (1709/1710)

The Dutch return to Fernando Pó


The Island of Fernando Po. For years a major contesting point between the Dutch West India Company and Portugal
The Island of Fernando Po or Bioko as the locals called was for many years dominated by the Portuguese who established trade and dominance over the islands local Bantu people attaching the Island to São Tomé and Principe. The Island had been first discovered in 1472 when Portuguese explorer Fernão do Pó which the Island would be named after later first visited the Island on his explorations of the coast of Cameroon. 22 years later in 1494 one of the last decrees of King John II of Portugal was to settle the Island and establishing Sugar Cane Plantations there. While the quality was "very poor" in comparison to later Caribbean Plantations for a while it managed to dominate the European Markets until the Spanish Caribbean Colonies stole that market just a couple of years later. For the next 150 years the Island would stay a backwater of the larger Portuguese Colonial Empire largely unnoticed by the Government in Lisbon.

However things changed in 1642 when the Dutch arrived under the banner of the Dutch East India Company.

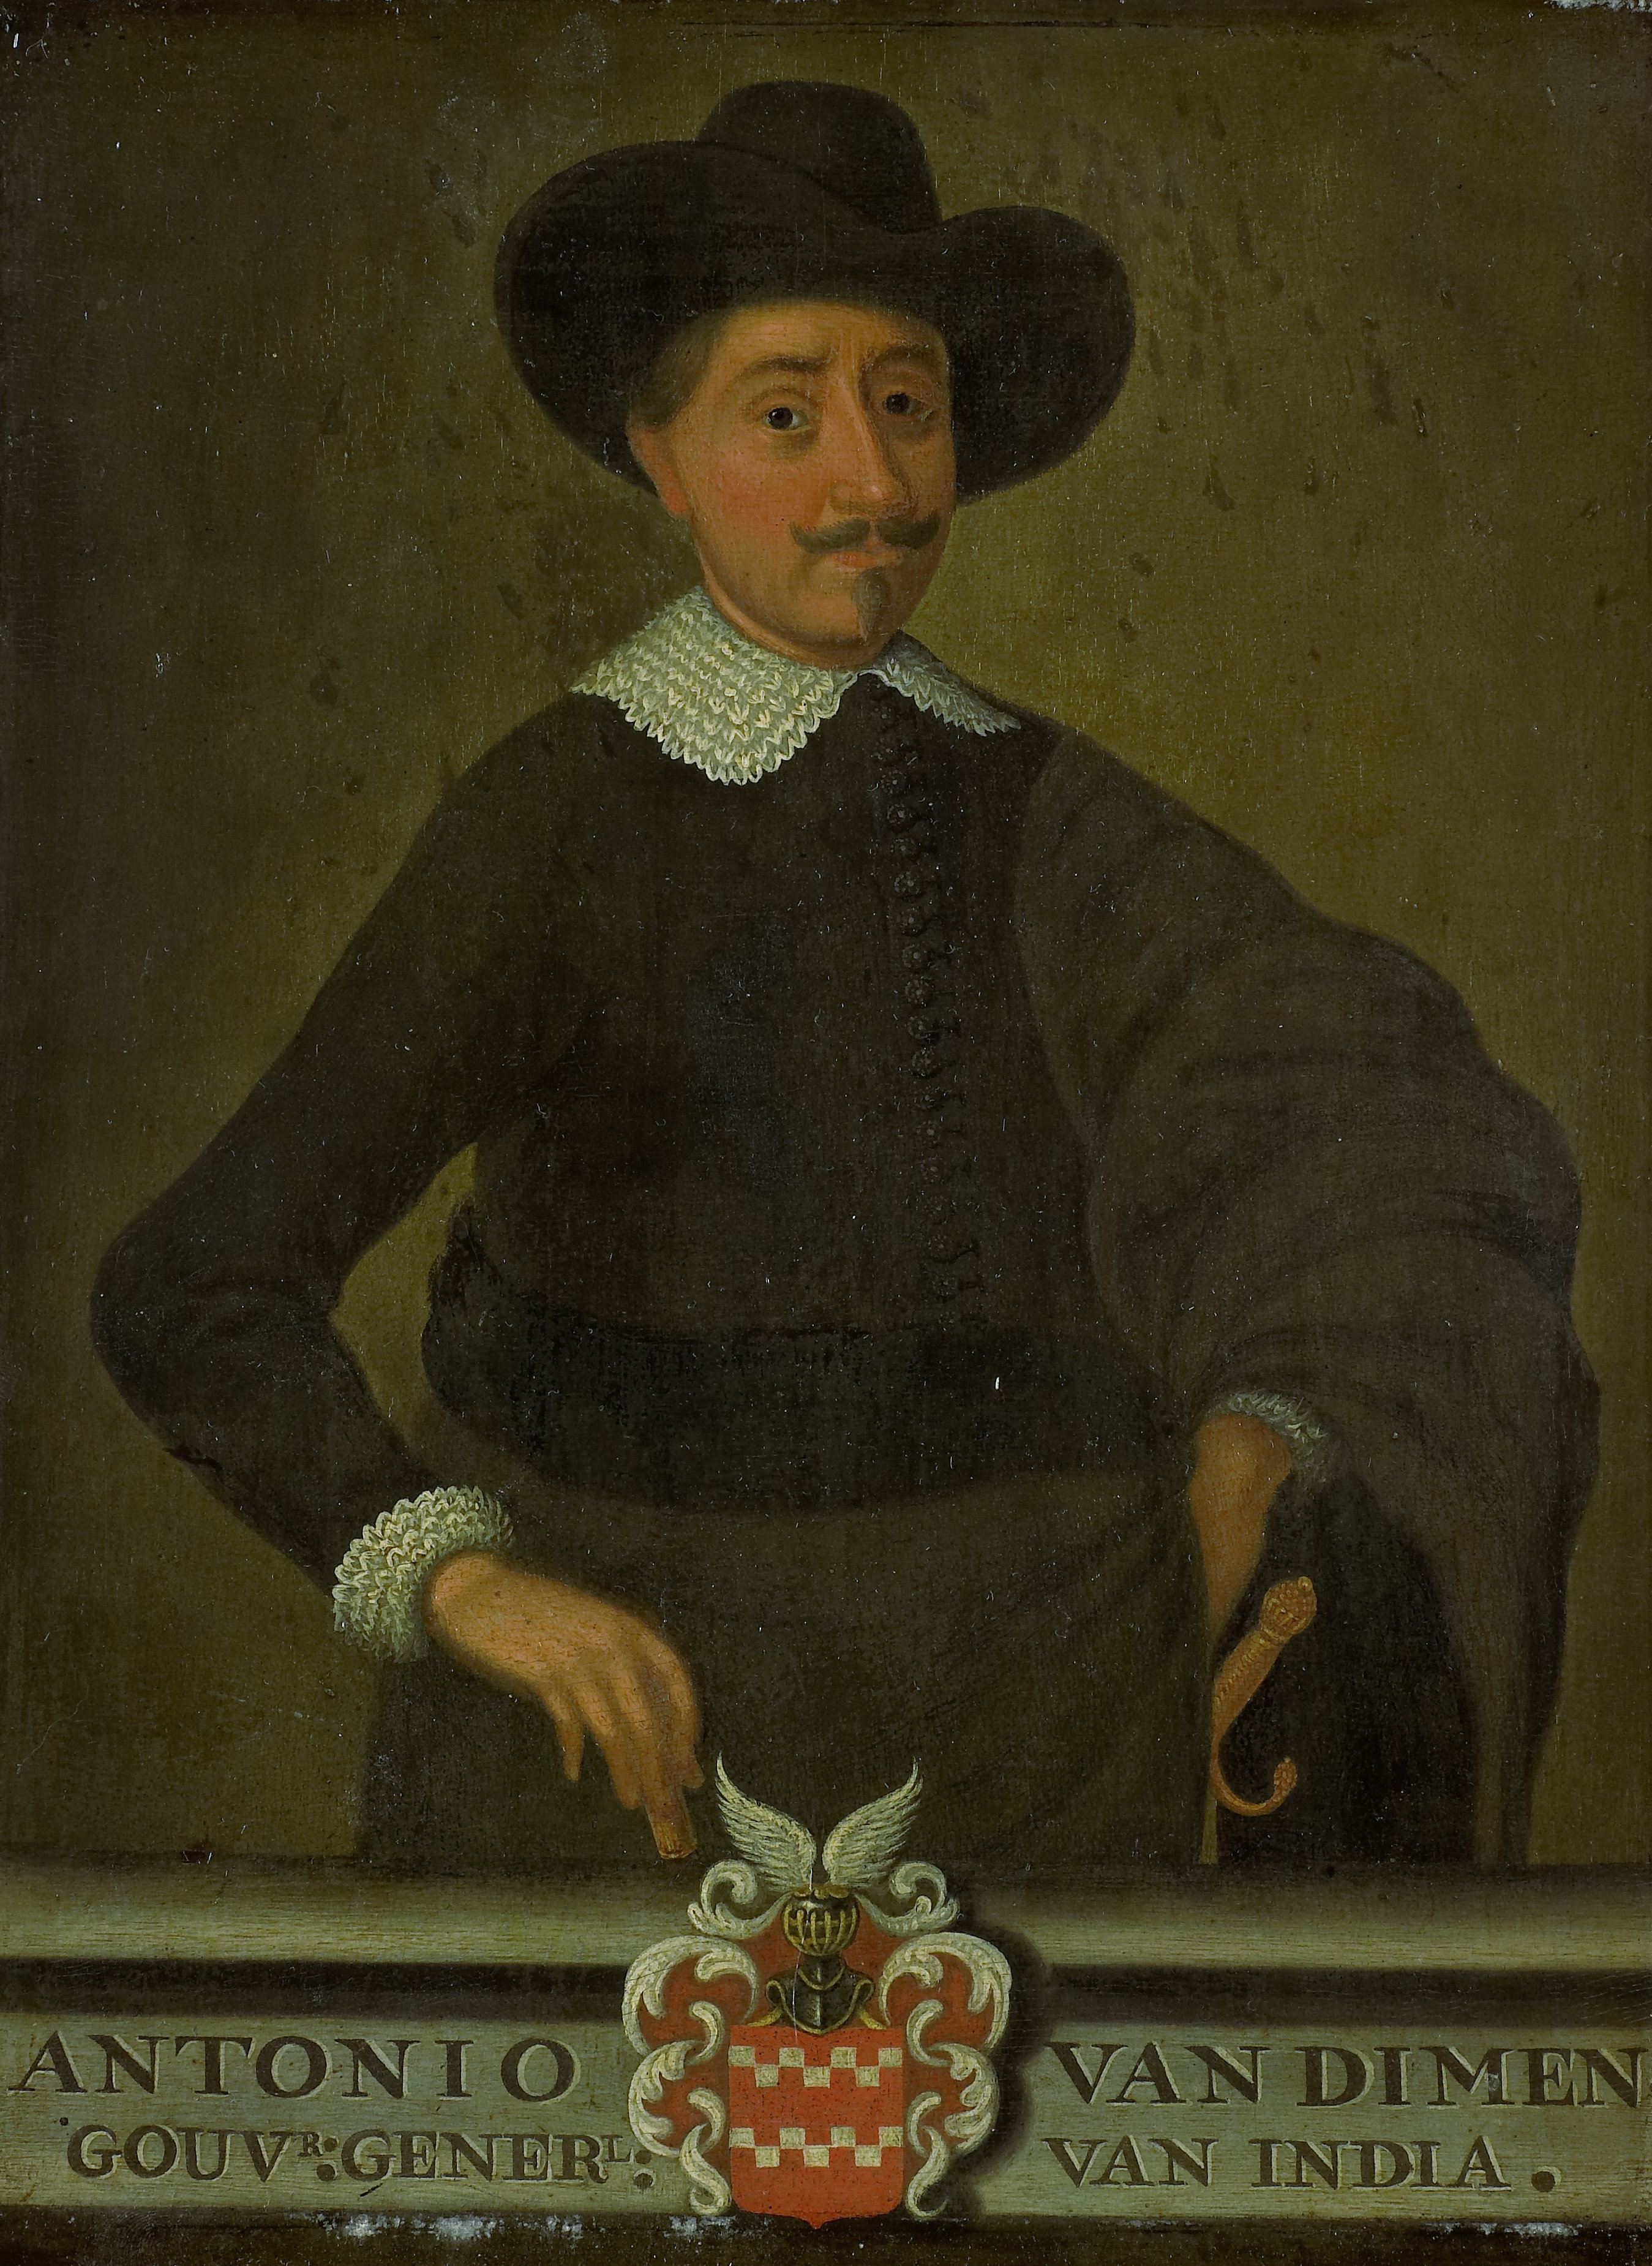
Anthony Van Dimen at the time was the Director of the Dutch East India Company and one of the most wealthy merchants in the Dutch Nation
You may be wondering the Dutch East India Company and not the West India Company. Well most of the Slave Trade operating out of the Gulf of Guinea was technically owned by the West India Company. But the East India Company saw Fernando Pó as not just a potential center to centralize the Slave Trade in the Gulf of Guinea true but also as a stepping point to supply India and Brazil which at the time Dutch had some presence in. Although the Dutch presence would only last 6 years before the Portuguese drove them off and established themselves in the naerby Island of Corisco.

Again for the next 60 years the Island would once again be forgotten and in fact due to lack of oversight the Portuguese abandoned the Island leaving it to the Natives to once again become de facto indepedent as the Kingdom of Bubi under Tribal Chief Molambo who moved into the Island's interior.

That lasted until later last year the Dutch needing to secure more ports along Africa to supply there newly buregoning colony in the Cape which was seeing a bit of a population increase as Settler Families left to go to the Cape to escape the Freezing conditions in the Netherlands something the Grand Pensioner of Holland at the period Anthonie Heinsius was in favour of.

In order to secure said ports the Dutch begun looking at maps of the African Coast looking for suitable places to establish new ports and they found through information sent back by the Dutch West Indian Company outposts in Africa that Fernando Pó had been abandoned by the Portuguese. Remembering the short period the Dutch owned the Island Heinsius gave orders to a small group of soldiers and settlers accompanied by 2 Schooners of the Dutch Navy to set sail to Fernando Pó and reestablish Dutch presence on the islands.

After a couple of months of travel the small group arrived on the islands with some Gold and other Manufactured Products and conducted a Treaty with the Chief Molambo after helping him get rid of some pretenders to his Throne. Molambo granted permission for the Dutch to settle on the Island in Exchange for protection against other European Slave Raiders and some degree of autonomy for its people. The Chief of the expedition one Rickard Guillit agreed and thus the Dutch established a small Fort to serve as the Capital of the islands which they named Fort Johan (OTL Malabo) after Stadtholder Johan Friso officially claiming the Island for the Dutch Republic and placing it under Admnistration of the Dutch West India Company.

Of course now many expect this could lead to an escalation with other powers but the Dutch are planning further expansion into ports on route to the Cape.​
 
Tuscarora War (A Bad Translation - 1711/1712)

Tuscarora War
A Bad Translation

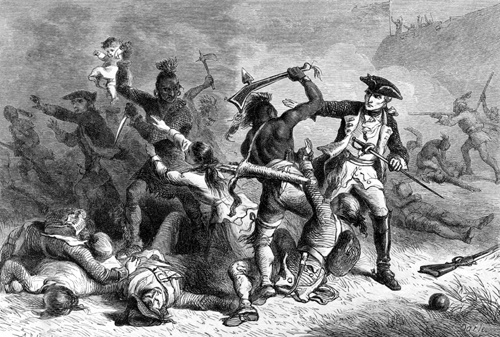
Battle of New Bern

The past few years have seen a dramatic increase in immigrants to the British colonies of North America. Many of these immigrants have originated from German states where they wished to escape the hardships of conscription, feudalism, etc. There have also been many Swiss immigrants. And lots of these immigrants have ended up settling down in the colonies Georgia and the Carolinas where the British government is offering great deals on land to promote growth in these underdeveloped and frontier colonies.

With so many new immigrants wanting land the colonies' have seen many generous land grants being granted in the frontier and beyond. This of course has meant that the new colonists have been encroaching on the land of Amerindian tribes. It has caused several tribes to be hit hard with diseases due to the increased contact with Europeans. Both of these events have caused several tribes to take issue with the British and their colonization. The most prominent of these groups has been Chief Hancock's Southern Tuscarora.

Hancock's anger with the colonists had been steadily growing for months when a confused encounter with a frontiersman pushed him beyond the limit. Outraged by the behavior of the colonists Chief Hancock called upon his tribesmen to arm themselves and prepare for war with the Europeans. He also succeeded in convincing the Pamplico, Cothechey, Coree, Mattamuskeet, and Matchepungoe tribes to join him. Thus a large army of Amerindian warriors was raised and gathered at Fort Neoheroka.

From Fort Neoheroka the Amerindian war parties descended upon the various frontier towns of North Carolina. These raids caused the slaughter of hundreds of men, women, and children and the razing of many settlements like New Bern. In response to this outbreak of war the Governor of North Carolina had the legislature of North Carolina call the militia. In response about six hundred militia were raised and one hundred and fifty Amerindian warriors were gathered. This army under the command of one Colonel William Stewart began to repel the raids of Chief Hancock.

William Stewart's force having forced back the war parties of Chief Hancock went on to launch an offensive. Stewart's soldiers marched further west deep into Amerindian territory and attacked the Southern Tuscarora at Fort Narhantes. After surrounding the fort the British militia assaulted it. With much bloodshed, mainly Amerindian blood, the British took the fort. In the process they killed hundreds of Amerindians, both warriors and civilains. Further they captured tens of Amerindians who would go on to become slaves.

Even though the Amerindian threat was beaten back it was not destroyed as Governor Hyde wanted it to be. Thus he engaged in negotiations with the chief of the Northern Tuscarora, Chief Blount, for his help. Hyde went so far as to offer Chief Blount recognized control of all the Tuscarora and guaranteed land along the Roanke River if he could aid the British in defeating Chief Hancock. To Chief Blount this was a dishonorable deed to betray his brethren like that, but the deal was simply too good to refuse. Hence he reluctantly joined arms with the British.

With the aid of Chief Blount and the Northern Tuscarora the British launched a renewed offensive in the summer of 1712. The key feature of this campaign was an attempt by Chief Blount to capture Chief Hancock. This attempt involved a night attack by a small party of Northern Tuscarora against the camp of the Southern Tuscarora. On a night of an absent moon Chief Blount performed his attack, but in an unforunate incident Hancock had been injured the morning of thus he was surrounded by attending warriors and shamans. These men, though surprised by the attack were able to hold it off while the rest of the camp roused and ran to save the chief. With the rest of the army awake the would be kidnappers were chased off and Chief Hancock was safe.

Even with Chief Hancock safe though the Southern Tuscarora and their other Amerindian allies did not fare well. The better tactics, numbers, and armaments of their enemies caused devastation in Tuscarora country as hundreds were being slaughtered and enslaved by the British and their allies. But even though Chief Hancock's alliance is losing it is yet to be broken and shall continue the fight at least for a couple years. Yet should the Governor of Virginia or South Carolina send aid to the North Carolina that fight may end much sooner.

The outcomes of the Tuscarora war so far were predictable. Early on the Siouthern Tuscarora surprise allowed them to have initial success. But once the North Carolonians and their Amerindian allies were able to get their forces together they were able to begin winning. And with the addition of the Northern Tuscarora the war has turned even more in favor of the British. The implications of the war are short term retardation of South Carolinian colonization as people fear the froniter. But long term victory will mean lots of open land for the British.

Summary of Events
  • Settlers encroach on Tuscarora land
  • Misunderstandings lead to war between colonists and Tuscarora
  • Tuscarora and allies raid frontier
  • Swift reaction from Governor repels Tuscarora and takes fort
  • Chief Blount joins British side
  • Chief Blount fails to capture Chief Hancock
  • Tuscarora losing
 
Toggenburg War (Renewal - 1711/1712)

Toggenburg War
Renewal

Bombardment of Zurich

Switzerland is a country near evenly split between the Roman Catholic Church and Reformed Church. In most causes the cantons themselves of religious unified with the bulk of the population all part of a single church in unison with the canton's leaders.. However the Imperial Abbey of Saint Gall and its county of Toggenburg were an exception to this generality. Toggenburg's Prince Abbot was a proud Catholic, but only a significant minority shared that with him. The rest were members of the Reformed Church.

The conflict started when the Prince Abbot's recatholising policies commanded the people of Wattwil the construction of a road in Ricken Pass that would end up connecting Toggenburg with the other Catholic Cantons. The Wattwilers however refused seeing the danger of such a road. And to protect themselves they called upon their Reformed Church protector cantons to stop the Prince Abbot. The Prince Abbot was helpless to oppose this intervention of the law and conceded that battle. However it would not be the end.

In response to the aggression of the Prince Abbot of Saint Gall the people of Toggenburg renewed their Landrecht with the cantons Schwyz and Glarus (1703 and 1704, respectively). This in turn caused the Prince Abbot to begin looking for allies among the Catholic Cantons. At first though the Prince Abbot's cries for help met little answer for few desired a civil war. But when the people of Toggenburg under the encouragement of Zurich and Bern proclaimed a constitution that declared autonomy and religious freedom the Catholic Cantons were scared into action. Several Catholic Cantons, even Schwyz, joined the side of the Prince Abbot as Switzerland split itself religiously.

The conflict further escalated when the Toggenburgers were armed by Bern and Zurich. With these arms the Toggenburgs militarily seized several of the Abbot's fortresses. Then within the Toggenburgers a radical Reformed Church fraction the Pines took power. This provoked the Catholic Toggenburgers to request the Prince Abbot's aid. Which in turn caused the Pines to occupy the land of the Catholic Toggenburgers. With such a clear military transgression the Prince Abbot was forced to take action and respond with force.

The war officially began in 1712 when Bern and Zurich issued a manifesto in support of Toggenburg and mobilized their armies. In response the Catholic Cantons of Lucerne, Schwyz, Url, Zug, and Unterwaiden mobilized in favor of the Prince Abbot of Saint Gall. Soon after the city of Geneva, Principality of Neuchatel, parts of the Prince-Bishopric of Basel, and Three Leagues raised their forces to support Togenburg. And on the Catholic side Valais, the Vogteien, and Freie Amter joined the conflict. Once more Switzerland was engaged in a religious civil war.

The outbreak of war saw the Reformed armies swiftly move to to occupy Thurgau and Saint Gall. During the taking of the latter of the Prince Abbot managed to flee to an estate on Lake Constance. However he need not worry for his property as Swiss rules of war called for a civilized gentlemen's war in which possessions were put under military control and taken to be held in the capitals of the captors. Meanwhile the Catholic armies after assembling were slow to save Saint Gall. However they did succeed in capturing Rapperswill.

After this the war became centered around the strategically significant Aargau which had the potential to cut the Reformed Church cantons in half. The Catholic Armies finally having gotten themselves in order managed to seize several bridgeheads at Baden, Mellingen, and Bremgarten. In response to the threat of being split apart the Reformed Church armies launched an immediate counterattack against the Catholics. Thus the Bernese army met the Catholics at the Battle of Mellingen. But after some initial success the Catholics managed to repulse the Bernese army and hold the ford. Meanwhile the Zuricher attempts to break the Catholics from the est were also rebuffed. Thus the Catholics successfully split apart the Reformed armies.

In light of the success of the five Catholic cantons thus far the Catholic cantons of Freiburg and Solothurn decided to risk joining the war even though they themselves were separated from one another and from the rest of the Catholic cantons. This shocked the Bernese who had all their forces concentrated in the county of Baden. Quickly the Bernese armies began to fall back to their capital which was just in reach of both the Freiburgers and Solothurnese. But in the rush the Bernese found themselves beset by from all sides by the armies of the Freiburg, Solothurn, and the Five Catholic Cantons. All oft his culminated in the battle of Kirchberg.

At Kirchberg the Bernese army was caught crossing the Emme River. Caught on both sides that is. On the west the Freiburg and Solothurn armies appeared after around a third of the Bernese army had crossed. Well on the east the army of the Five Catholic Cantons had closed on the Bernese army. In the hours that followed the Bernese army tried to fight off its enemies. But the numbers of the Catholics were too much. After much bloodletting the Bernese army was shattered in a series of daring assaults.

With the Bernese army scattered the Catholics successfully took the city of Bern and defeated the canton. With Bern defeated the Catholics marched northwestward against Neuchatel and the Reformed Church allies within the Prince-Bishopric of Basel. There the weaker Reformed Church armies were destroyed by the Catholic army. With this the whole of the western Reformed Church cause had collapsed and all that remained was Zurich and Toggenburg. But the Three Leagues who had thus far been inactive raised their armies and reinforced the Zurichers, who had thus far lacked the troops to defeat the Catholics at Aargau.

The Catholic armies swiftly marched eastward to reinforce the bridgeheads. Meanwhile the Zurichers, Toggenburgers, and Three Leagues having regrouped marched westward to confront the Catholics at Freie Amter. The two armies would collide at the ford of Fischbach. There for the first day the Catholic garrison struggled to hold back the Reformed Church soldiers. But after taking many casualties they threw back the Reformed troops and gave the main Catholic army time to reach the town and join the battle. The next day the Reformed commanders threw everything they had at the Catholic bridgehead. But for all the blood they shed they failed to take it. Worse, the Catholics successfully threw the Reformed army from the field with a decisive counterattack.

After the defeat at Fischbach the Reformed resistance crumbled and the supporters of Toggenburg came to terms with the Catholics. In a humiliating treaty the Reformed Church cantons lost control of Baden and Freie Amter, cutting Bern and Zurich off for the near future. But worse the Bernese land west of Saane and north of Freiburg was ceded to Freiburg and Solothurn, cutting Biel and Moutier off from Bern. The Catholics also gained Gemeine Herrschaften in several Swiss areas. And finally Saint Gall was connected to its allies with the Ricken Pass Highway and the Prince Abbot's mini Counterreformation was allowed to continue.

The Reformed Church defeat was caused by a few things. At first the Reformed Church had the advantage, but their focus on political Toggenburg allowed the strategic bridgeheads at Aargau to fall to the Catholics. And since the Catholics held them they were able to split the Reformed Church armies. This then brought in the armies of Freiburg and Solothurn. Surrounded and outnumbered Bern's army was unable to save it. And once Bern had fallen the rest soon followed. The implications of the Catholic victory are huge. the crushing Catholic victory will probably be accompanied by an upsurge in Catholicism in the Swiss Republic in the coming years. And its harsh terms almost certainly mean that Many Protestant Swiss will emigrate for more friendly countries like Prussia, Sweden, or Britain and her colonies.

Summary of Events
  • Tensions in Saint Gall steadily rise
  • War breaks loose
  • Reformeds take Saint Gall
  • Catholics take Aargau
  • Catholics hold Aargau
  • Solothurn and Freiburg join Catholic side
  • Bernese overwhelmed
  • Neuhatel, Moutier, Biel, etc. overwhelmed
  • Three Leagues actively intervenes
  • Zurichers defeated at Fischbach
  • Reformed Church signs humiliating treaty
 
Maratha War of Succession (A Business Affair- 1711/1712)

Maratha War of Succession
A Business
Affair

Maratha soldiers

The previous years saw the Mughal emperor Muhammah Azzam Shah release Shahu on the condition that try to seize the Maratha throne. Keeping with this promise Shahu marched into the Maratha Empire with a small army and was almost immediately defeated by the superior army of Dhanaji Jadhav. But in a shocking turn of events Jadhav joined forces with Shahu after confirming his identity. This caused chaos among the supporters of Tarabai, who had lost her best general and best army. But she managed to regroup and blunt the offensive of Jadhav. Thus the Maratha succession was very much in question.

The campaigns of 1711 began as Jadhav's army marched on the fortress Dharwad which he put under siege. There Tarabai had fortified herself. Indeed she had quickly renovated and expanded the city's fortifications during the winter. And though in many cases one might be skeptical of such rushed construction her fortifications were sound due the advice and manufactured tools she had received from European engineers. Among them were some European military engineers who had come to India in search for fortine.

To counter Tarabai's European style fortifications Jadhav had some European cannon and guns. But further he also had the army of British East India Company by his side. Of whom many were afflicted by disease and heat. Nonetheless it still gave Jadhav a decisive advantage in technological warfare against Tarabai. An advantage that Jadhav expected might bring him victory. However for months he pounded away at the new wet mud outer walls of Dharwad to no avail, as they their wetness allowed them to bounce back cannons balls for days. And days. It was only in the few weeks before the monsoon that the outer walls were finally breached. But behind them still laid the staunch original stone walls of the Dharwad. And though they yielded more easily than the outer walls they would not yield fast enough. Instead Jadhav was forced to break the siege or risk being caught by the monsoon.

During the monsoon a respite from war was offered. During this time Tarabai and her European advisers repaired Dharwad as best they could. And they also increased the number of gun emplacements within the city's defenses due to the arrival of French and Dutch cannon. Also some European soldiers searching for riches joined the forces of Tarabai and established the her first "European" regiment which consisted of a command of European officers and hundreds of Maratha soldiers armed and trained in the European fashion. Also a student of Vauban had joined Tarabai's ranks and greatly improved the defenses of Dharwad and the use of its complex geography.

Thus when Jadhav and his British East India Company allies arrived they faced a stronger challenge than before. The hills of Dharwad were covered with extra defenses in the form of bastions and redoubts that extended from Dharwad's fortress. And as the army of Jadhav approached the fortress they were harassed by quick sprays of gunfire or arrow volleys from the brush of Dharwad before Tarabai's soldiers fell back to the redoubts. Once more the siege was engaged Jadhav's artillery began to hammer at Dharwad. But Tarabai with her confidence strengthended after the success of the first siege was more daring this time. During the night her famed cavalry would raid the army of Jadhav and even sometimes destroy an artillery battery to the jubilation of the defenders. Under these conditions Jadhav was able to slowly, albeit at high cost, advance against the city's defenses. Until Tarabai's prays were answered.

In the rest of the Maratha Empire there was question of whether to support Shahu or Tarabai and her son. Legally most agreed that Shahu had the claim. But what worried them was Shahu's afflicatio with the Mughals. In fact his mother was still imprisoned by the Mughals to ensure his obedience. No one wished to be the subject of the Mughal Empire. And the aid from the British who were great allies with the mUhgals did not help the case of Shahu. Many saw it as confirmation that Shahu was only working iun the interests of the Mughals and also that the Maratha would be economically exploited by the British East India Company if Shahu won. And amidst this argument agents from both sides were at work. In the end it was Tarabai's cause that won out among the undecided princes.

These princes then, led by Dado Malhar, raised another army to relieve Tarabai at Dharwad. This army once assembled marched north to Dharwad. Jadhav in response was forced to break siege of risk being flanked and destroyed. Thus ended the second siege of Dharwad. Yet Tarabai was unable to continue her success due to the fact that her numerical superiority was not decisive and Jadhav's generalship she knew to be competent. Instead she remained at Dharwad and further strengthened her position until and through the Monsoon. Jadhav meanwhile focused on raising funds and more soldiers.

The army of Jadhav failed to take Dharwad as the already strong fortress was strengthened to the extent that it could hold out till the monsoon. Once it had it was able to reinforce, repair, and retrain to produce a stronger defense. Which then held off long enough a relief force to force an end to the siege of Dharwad. Within the politics of the Maratha the princes kew that Shahu's claim was best, but they feared his submission to the will of the Mughals and the Britis East India Company would be vastly damaging to the Maratha Empire in the years to come. The implications of the failure of either side to produce a decisive victory means that the war goes on. Meanwhile the increased presence of the trade companies of Europe in this war has caused technological improvements in both Maratha armies and also has raised tensions at home.

Summary of Events
  • BEIC reinforces Jadhav​
  • FEIC and VOC support Tarabai, but only indirectly​
  • Tarabai positions herself at Dharwad and fortifies​
  • Jadhav besieges Dharwad​
  • Jadhav breaks siege for Monsoon​
  • Tarabai repairs and further strengthens Dharwad​
  • Jadhav besieges Dharwad​
  • Tarabai wins over the support of remaining Maratha princes​
  • Princes relieve Dharwad​
  • Jadhav retreats Northward​
  • Tarabai further builds up Dharwad​
 
Second Time of Troubles (Demons' Feast - 1711/1712)

Second Time of Troubles
Demons' Feast

Tsar Karl Fridih I of Russia

The past couple years for Russia were dreadful. Winter killed many and the famine that followed killed far more. Weak, ineffectual leadership gave rise to even more death and plague in the capital, Moscow. Then cowardice and idiocy shattered the credibility of one government and ensured that Russia would fall to chaos. Chaos that witnessed rise of a new pretender and claimant to the Russian throne and her powerful allies in the north. Chaos that then allowed her and her powerful allies to size Moscow. Chaos that further made way for the fall of Kazan and its "cleansing". Chaos that even allowed the Don Cossacks to throw off the fetters of Moscow and liberate themselves. Chaos that never ended and instead made Russia but a Demons' feast.

Karl the Magnificent's Invasion

Russians surrendering to King Karl XII the Magnificent

King Karl XII the Magnificent, the Conqueror, the Ambitious, the Brave, the etc. of Sweden had yet to forget the days when he was not remembered so. Instead he remembered distinctly the days in which he had foolishly marched headlong into Russia and found himself defeated by no man, but by God. That defeat was then followed by several years wasting away in Russian imprisonment while his Riksdag allowed his empire to crumble. And now he was free and victorious, having crushed Poland-Lithuania. But he still did not forget the days before.

It was in memory of those days that he devised a plan to invade Russia once more in light of Russia's collapse. This time though he was not going to be defeated by the men nor the elements of Russia as he was more acquainted with them now and understood the minimal knowledge to respond to those elements. Thus he raised the armies of Sweden once more for war. But this time he placed a heavier focus on cavalry and mobility so that he could move quickly into and if need be out of Russia to avoid the mud and snow. And to give legitimacy to his invasion he decided that while he was at it he would crown his nephew Karl Frederick, Tsar Karl Fridih I of Russia.

Once the spring rasputitsa ended Karl XII launched a massive attack against Russia. At Ivanogorod his army surrounded the fort. He then demanded that it surrender with terms or face a graver end. The obstinate Russians refused his offer. And in the assault that followed the Swedes swarmed the fort and obliterated the garrison. This swift attack caught the Russians off caught. And as they were still making to react Charles followed his success at Ivanogorod with a descent on Novgorod. There the weak Russian garrison was also offered the chance to surrender. Here however the Russians did surrender as the nobles and commanders left in Novgorod cared more for their own persons and wealth than for Catherine Ivanovna's.

The garrison of Novgorod did not regret this as Karl rewarded their surrender by pouring grain into the city. He also enforced martial law in the city and the province restoring the once lost order to the region. Further he willingly cooperated with the existing Russian bureaucracy and nobility upholding their rights and protecting their properties. However the former were vigorously watched to prevent and weed out corruption during the distribution of grain to the people of Novgorod. This was a practice that the Swedes continued everywhere.

Meanwhile in the north a small Swedish force invaded the Kola Peninsula and Russian Karelia. There they overrun they very little populated region and seized its few forts and settlements. Indeed their conquest was without so much difficulty that after they had accomplished it they rode on Arkhangelsk. There they besieged the town and waited fro the ice to close off its port. Once it had they surrounded the town and starved it out. Once its rations were low enough the garrison capitulated and handed Arkhangelsk to the Swedes.

With the original powerbase of the Ivanovnas seized all that remained was Moscow and the road to it. On his second march down the road King Karl XII made sure to continue his conciliatory policy towards the Russians. This combined with the Rurik blood in his nephew through his nephew's father earned Karl's cause many supporters. But what earned him more was his grain. Which though expensive seemed an acceptable cost to humble Russia and bring it under Swedish influence thus forever ending its threat to Sweden and turning it into an ally.

So bad was the desertion and dissatisfaction among the Ivanovnas that Vasiliy Gargarin felt the city of Moscow unsafe and a liability. Instead he chose to meet Karl in the field north of Moscow near the road at Talaevo. There Gargarin hoped to use the waterways and lakes to his advantage against the superior army of Karl, which had the experience, numbers, and discipline on its side. The next day the battle began when Karl's infantry advanced against Gargarin's began suppressing it with volley after volley. Already Gargarin's army shook. And it would break when the Swedish cavalry, which had been riding through the night, appeared on the Russian right from around Senezhskoye Lake. The cavalry smashed the Russian right and colapsed the Russian army right then and there. In the few hours would be occupied with the surrender of several Russian formations and the chasing and dispersing of the other ones. Among those captured was Vasiliy Gargarin. The Battle of Talaevo was a crushing victory for the Swedes and a decisive end to the Ivanovna cause.

In light of the defeat Catherine Ivanovna and what little forces she had left abandoned Moscow and fled eastward towards Nizhny Novgorod. In the meantime Karl XII marched into Moscow and treated the citizens with great respect and dignity. However his army for the most part avoided the city while the plague died down. His nephew however received a full coronation in front of many Swedish officers and Russian nobility. The Tsar Karl Fridih I then rode the streets of Moscow and embraced the people, at a distance. Karl did not give chase to Catherine just yet as the autumnal rasputitsa delayed those plans.

After months of consolidating and waiting for the winter and then the spring rasputitsa to end Karl finally was able to march. Taking half of his army, still a sizable a force, east he left many thousands of men to retain order and control over the occupied segments of Russia. Once Karl reached the city of Nizhy Novgorod he found a small, haggard garrison left. Thus he made simple terms to Catherine: Surrender, recognize Karl Fridih, and retire to a comfortable life with her husband. Her own opinion though did not end up counting for much as within hours her remaining supporters agreed to the terms and surrender Catherine to Swedish custody.

The ease of the Swedish intervention comes from several things. Primarily the Swedish were completely militarily dominant over the Russians and the Russians had no means of truly opposing the Swedes. Secondly the conciliatory, orderly, and gentlemanlike fashion in which the Swedes treated the Russians by handing out grain and restoring order was well met. Finally the Rurik blood of Karl Fridih allowed Russians to view this invasion as another claimant coming to power rather than a Swedish war of conquest.

The implications of the Swedish success are great. Swedish success means that Russia might yet return to order and stability after years of chaos and millions of deaths. Yet Tsar Karl Fridih I and his uncle King Karl XII the Magnificent first have to decide which battles to fight among the many potential ones the various rebels and foreign invasions that afflict Russia. It also means that due to the friendly nature of Sweden adnd the Ottomans that the Ottoman allies may be able to get away with some nice gains at little cost. Or instead the Swedish relationship with the Sublime Porte may deteriorate. And the same can be said of the other situations within Russia.

Summary of Events
  • Swedish invade with Karl Frderick as their claimant​
  • Swedish take Ivanogorod​
  • Novgorod surrenders to the Swedes​
  • Kola Peninsula and Karelia are swept by the Swedes​
  • Arkhangelsk falls to Swedish siege​
  • Karl marches on Moscow​
  • Karl finishes Ivanovnas at Battle of Talaevo​
  • Catherine runs to Nizhny Novgorod​
  • Karl Fridih crowned​
  • Karl marches on Nizhny Novgorod in 1712 and secures its surrender​
  • Throughout campaign Karl gives grian to Russians at great cost and is nice to the nobility​
The Polish-Lithuanian Invasion

Polish, Lithuanian, and Ruthenian soldiers

The Swedes were not the only ones who wanted to take advantage of Russia's chaos. The new Polish-Lithuanian King Jakub Ludwik I desired to prove himself and restore his fathers Commonwealth to a position of power and relevance. Thus when his ally, the Swedes, engaged him about aiding in invading Russia and placing Karl Fridih on the throne of Russia he was willing to oblige. Besides prestige and family Jakub had ambitions to retake Smolensk for the Polish-Lithuanian Commonwealth, which had been lost in the previous war with Russia.

Similarly to King Karl XII, King Jakub Ludwik I waited for the spring rasputitsa to end. But he was not able to immediately launch his offensive like the Swedes at that point, for the rasputitsa also affected his eastern provinces. Once he had gathered his army he was able to march eastward in to Russia. Preceding his army was a wide screen of Ruthenian cossacks who made sure that the land was clear of enemies before the main army invaded Russia. And as predicted there was little opposition outside the city of Smolensk.

When the Polish-Lithuanian-Ruthenian army finally arrived at Smolensk it surrounded it and put it to siege. Opposing them was a small force that represented the last remnants of the Petrovich cause. This army was undaunted by the Poles who they viewed as weak and defeatable. However as the siege progressed the Russian sorties fared less and less well. Meanwhile the walls crumbled steadily. Finally once an acceptable breach was formed Jakub ordered the assault. The assault teams bravely threw themselves into the breach and at great cost succeeded in taking and holding the breach so that the rest of the army could flood into the city. The following hours saw the Russians contest the city with the Polish-Lithuanian-Ruthenian army. However they failed in the end as the better conditions and stronger numbers of the Polish-Lithuanian-Ruthenians won out.

In the aftermath of the fall of Smolensk the Petrovich cause came to end. The rest of the Petrovich holdouts in the west collapsed as King Jakub's armies took them. And during the siege of Smolensk, Tsar Alexei was captured by a pair of Ruthenian cossacks as he tried to ride out of the city. This capture ended the Petroviches as Alexei prouded renounced the throne and even attended the coronation of Tsar Karl Fridih and publicly abdicated in Karl Fridih's favor. All in return for the promise of allowing him to marry his mistress and retire to a small, but wealthy estate.

Summary of Events
  • Commonwealth invades once weather permits​
  • Commonwealth besieges and takes Smolensk​
  • Rest of Petrovich holdouts fall​
  • Alexei is captured and wanting no more part of this quits it all and accepts Karl Fridih as king​

Cossack War of Unification

Cossack cleanup after skirmish with Russians

Outside of the war of pretenders and claimants was the ongoing rebellion of the Don Cossacks which had established itself over the previous years and managed to constolidate to an extent. This rebellion threw the attention of the Sublime Porte who was interested in adding to its series of buffers against Russia. Thus it asked the Don Cossacks brethren, the Zaporozhian Cossacks, to bring the Don Cossacks into the fold or toherwise support them. But the Zaporozhian Cossacks went a step beyond when they convinced the Don Cossakcs to unify the Zaporozhian Cossacks and form a strong, united state against Russia.

Unified with the Don Cossacks in name the Zaporozhian Cossacks also needed to unify in blood. Thus they assembled the Sich at Sumy and raised an army of many thousands. This army then flooded over the demilitarized zone and seized the defenseless city of Belgorod in a dashing raid. The trade center of Kursk soon followed when the Cossacks broke through its gates and rode down its streets. With this quick, devastating beginning to the Cossack war the two hosts were able to unite their armies and form a large, formidable army. In fact it was the largest organized army in Russia at the time.

With this army in hand the Hetman Petro Yakolav and the atamans rode on the city of Ryazan. There there was an actual Russian force, albeit weak and mainly made up of militia. Nonetheless it was enough to force the Cossacks to lay siege to it. The Cossacks did have some artillery with which they could besiege the city. But instead the Cossacks chose to starve the city out. Meanwhile half of the army split off and rode on Bryansk where they too surrounded the city and began to starve it out. For many weeks this continued until finally the cities were forced to capitulate to the Cossacks. Thus the vast majority of land south of the Oka and Dnieper was in Cossack hands.

The success of the Cossacks emerges from a few facts. The region in which the Cossacks were fighting was poorly defended by the Russians. The majority of the remnants of the Russian army were to the north fighting against the Poles and the Swedes. The rest were thinnly spread fighting the various raiders that afflicted Russia. And the main forces in the south had already been defeated by the Don Rebellion. Thus the Cossacks were not fiercely opposed. Also the fact that the original fortifications of the region had been destroyed during the previous war with the Ottomans meant that the Cossacks could not be effectively stopped and that they were instead able to overwhelm and freely maneuver through the region.

The implications of the Cossack success are great. The Cossack success means that much of the Cossachs have been freed and unified under this single grouping. This presents a sizable and formidable buffer against Russia.which was somewhat more than the Ottomans had originally desired. However the defeat of the original contenders for the throne and the replacement of both them with the strong Swedish claimant could mean trouble for the Cossacks as they might be forced to fight a determined, disciplined enemy.

Summary of Events
  • Zaporozhians and Don unite​
  • Zaporozhians overrun Belgorod and Kursk​
  • Zaporozhians and Don armies unite​
  • Cossacks starve out Ryazan and Bryansk​
  • Cossacks secure large portion of Southern Russia for themselves​
Muscovy Company's Intervention

Muscovy Company ships wintering in Sea of Okhotsk

Besides the wars of for the Russian throne and the Cossack fight to unify there was another set of conflicts that emerged. That was the Siberian revolts. Throughout Siberia, though many hundreds of thousands of Siberians had died through disease and war there were still hundreds of thousands of Siberians left that despised the Russians and wanted independence once more. Thus when the chaos ensued many stopped paying the yasak or tribute to the Cossack and Russian officials. And some even took up arms against the Cossacks and Russians.

All of that escalated when the Muscovy Company in its desire to reestablish itself in Russia and Russia's fur trade chose to intervene and support the Siberians in open rebellion. After begging Parliament and the Queen for days the Muscovy Company was able to receive the funds it needed to provoke and supply several rebellions against the Russians in Siberia. These rebellions which if successful could vastly expand British influence and power in Russia and in Asia. Thus began the Muscovy Siberian Rebellions.

In western Siberia the Muscovy Company was determined to launch a rebellion among the Komi people. Thus a small fleet was gathered and in its cargo were thousands of muskets and barrels of gunpowder. This fleet sailed north, docking in the ports of Norway along the way. And finally it sprinted across the Barents Sea to the mouth of the Pechora River. There the Muscovy Company officials met with Komi rebel leaders and began to distribute the weaponry to the Komi. However the fleet was forced to stay in Russia for the time being due to icy nature of the sea.

These weapons combined with those which the Komi already had were utilized to launch the rebellion. Tens of thousands of Komi warriors armed with musket, bow, and sword rose up against the Cossack and Russian settlers. The hundreds of settlers would be slaughtered over the course of several months as the Komi razed Russian settlements and liberated Komi ones from Cossack military oppression. The lack of preparedness and aid from a central government allowed the Komi rebellion to quickly get out of hand. And when it was resupplied in 1712 with more weapons and gunpowder by the Muscovy Company it just grew bigger and liberated even more Komi land.

In the east the main Muscovy Company effort took place. In a long journey across the world a convoy of Muscovy Company ships traveled from Britain to the Sea of Okhotsk. There the Muscovy Company representatives met with Kolyat leaders. With ease they convinced the Koryaks to rise up and murder as many Russians as they could in an effort to take control of the peninsula. The Russians did their best to defend themselves. But their small forces and population in the region could not defend the now well armed Koryaks.

With the success of Koryaks the Muscovy Company made a daring adventure west. With the aid of Company soldiers and sailors a group of Muscovy Company officials and a large convoy of supplies made its way from the peninsula to the land of the Yakuts. There the officials once more convinced the discontented Siberians to rebel against the Russians. Now armed with modern European weaponry the Yakuts were able to repel the Cossacks who demanded Ysak from them. And they also succeeded in seizing the few settlements of the Cossacks and Russians in the region.

The success of the Muscovy Company sponsored rebellions comes from many facts. that the tribes that the Muscovy Firstly the Russians were already struggling to suppress these numerous Siberian peoples, who all had the numerical advantage in their own region. So now armed with modern guns the Siberians were simply too much for the Russians to stop. Thus their position in the three regions collapsed. The implications of the rebellions success is great. It presents a huge problem to the new government of Karl Fridih which will struggle to suppress the rebellions. Meanwhile it also marks a resurgence of the Muscovy Company should its gamble win and some of the rebellions be recognized as independent states.

Summary of Events
  • Muscovy Company secures support to intervene in Russia​
  • Muscovy Company sends small fleet to supply and provoke Komi rebellion​
  • Komi Rebellion successfully seizes much of Komi region​
  • Large Muscovy Company convoy sails east and supplies and provoke Yakut and Koryak rebellions​
  • Koryak rebellion successfully throws Russians out of peninsula​
  • Yakut rebellion seizes Yakutia​
Raids and other Evils

Russian slaves

Outside of all this organized warfare were the other afflictions that wrecked Russia. Those being raids, plague, famine, and brigands. The raids of the Khanates continued to damage Russian agriculture and civilization with the razing of farmlands and towns. Alongside that the Khanates continued to enslave thousands of Russians and sell them in the south to the Ottoman Empire. The plagues in Russia have began to die down, but disease and leser ailments continue to afflict the Russians. Famine is still a major issue among the Russians. The destruction of much of Russian agriculture by man and by weather has caused millions of Russians to die and set back Russia demographically for a century. Lastly widespread banditry continues in Russia however in the Swedish and Polish occupied regions it had significantly declined in the face of organized military force. In total Russia is badly off and the affects of today will negatively affect Russia for decades to come.​
 
Saxon Succession Crisis (Twilight of the Regency - 1714)

Twilight of the Regency

Fredericke Charlotte
, the woman who would wed the new elector of Saxony

...As the Prince Elector of Saxony Frederick Augustus II approached the age of adulthood the joint regency of Pussia, Hannover, and the Archbishop of Mainz established in the Treaty of Altranstädt would soon come to an end. But before such could occur, a minor crisis needed to be resolved. Frederick Augustus II was the last male heir of the main branch of the house of Wettin besides his father. This meant there was immense pressure to find a suitable heir quickly for him, lest he die without a son. Such an untimely death was sure to throw Saxony in chaos with the three differing branches of Wettins and Augustus the Strong all trying to gain control of the crown. Thus the triumvirate nations of the regency sought out a suitable heir. It was eventually decided Fredericke Charlotte of Hesse-Darmstadt would be a perfect match, being young and Protestant. The marriage would be considered the last major action undertaken by the regency in Saxon affairs before power transferred to the hands of the young Augustus.

((Approved by @Kurtov))
 
Tuscarora War (Feeling the New Bern - 1713/1714)

Tuscarora War
Feeling the New Bern

North Carolinan officer with allied Northern Tuscarora

The previous two years had seen tensions between the Southern Tuscarora and the North Carolinans escalate into war. The Southern Tuscarora began the war with a successful series of raids, but the North Carolinans soon managed to repulse these raids and launch a successful counteroffensive. Then a a bit of North Carolinian diplomatic genius successfully brought the North Tuscarora in on the side of the colonists of South Carolina.

The war of 1713 began with word from Britain requesting that the South Carolinian and Virginian legislature support the North Carolinans in their war with the Southern Tuscarora. Following some moving speeches from North Carolinan diplomats both of these legislatures soon agreed to this and proclaimed the raising of some of their militia to aid North Carolina. Together the two colonies raised a total of 1000 militia to and 500 Amerindians to support North Carolina.

With these added forces under the command John Washington, a Virginian militia captain, the war turned decided against the Southern Tuscarora and their allies. The large colonial militia and Amerindian army soon besieged the most valuable fort of the Southern Tuscarora, Fort Neoheroka. There much of the remaining strength of the Southern Tuscarora and their Chief Hancock had gathered to hold off the colonists. This would be overcome a month later after a wildly successful assault of the colonists overwhelmed the fort and crushed the Southern Tuscarora army.

With the fall of Fort Neoheroka the Southern Tuscarora as a military threat were eliminated. However their allies the Machapunga and the Coree continued to fight against the colonists. They even managed to launch some raids against the settlements of North Carolina. However the join North Carolinan-South Carolinan-Virginian-Amerindian army quickly shifted its focus to these two tribes. Then after beating back the raids they invaded the Pamlico Peninsula, the homeland of the two tribes. There in a brutal fashion the two tribes' military might was destroyed by the colonists and their allies. This campaign virtually ended the Tuscarora War.

The success of the colonists comes from a few things. North Carolina alone was already on the road to victory, but with a rare show of unity from South Carolina and Virginia, the Southern Tuscarora were crushed even faster and harder. The Southern Tuscarora and their allies could not compete in numbers, weapons, or even skill. Thus they fell, not the North Carolinans. The implications of the war's results are great. The Southern Tuscarora's and their allies' lands have been distributed to the Northern Tuscarora ad colonists. Thus has sparked a new set of conflicts entirely.

Summary of Events
  • Britain asks the Virginia and South Carolina help North Carolina
  • Virginia and South Carolina agree to aid North Carolina
  • Colonial and Amerindian army crush Southern Tuscarora
  • Machapunga and Coree continue to fight
  • Colonial and Amerindian army crush Muchapunga and Coreee
  • Tuscarora War ends in Colonial victory
 
Second Time of Troubles (Self Exclusion - 1713/1714)

Second Time of Troubles
Self Exclusion

Swedish cavalry

The previous two years had seen the chaos for the Russian throne finally stabilize. King Karl XII the Magnificent of Sweden successfully managed to conquer Russia where he had failed before. In fact the once great foe was greeted as a friend by many, for his conquest ushered in stability and food security. In this Karl was aided by his soon to be father in law, Jakub Ludwik of the Polish-Lithuanian Commonwealth. Meanwhile the Cossacks united in the south. And in the east the Muscovy Company raised several Siberian rebellions. Thus while the heartland was secured the periphery continued to live in chaos.

Karl XII was a military man who had accomplished much through the use of arms. Yet he had also slowly learned the might of the pen. Thus he chose his battles carefully and decided against risking the ire of the Sublime Porte before he had fully tamed Russia. Hence Sweden compromised with the Ottomans to achieve an acceptable peace with the Cossacks and the Kazan Tatars. The Cossacks Karl treated hardly as he cut down their demands significantly. While he was much more generous to the Kazan Tatars, whom he granted Kazan as while as some Russian plains.

The Siberians and the Muscovy Company Karl would have none of. Karl understood that Siberia was not known for development nor riches, yet it still held importance as vast majority of the Tsardom of Russia. It also contained some of Russia's only untouched agricultural regions, which were vital to securing his hold over Russia as a whole. And to maintain those farmlands he needed to maintain Siberia's integrity, which called for defeating rebellions rather than engaging in diplomacy with them. Hence he refused to even take the diplomats of the Muscovy Company.

Come 1713 Karl would disperse his army across Russia to deal with its various aliments. Some regiments garrisoned the new borders and rebuilt old fortification lines to prevent Russia from galling to foreign invasion from the south once more. Other regiments were tasked with suppressing the banditry and general disorder in the countryside and reestablishing order throughout Russia. Meanwhile the Swedish officers and drill masters focused on rebuilding the Russian army into a professional force.

To the east the Karl deployed the vast majority of his cavalry as well as several of the more organized Russian regiments. This force under the command of Marshal Adam Ludwig Lewenhaupt's goal was to move swiftly east and crush the rebellions and secure Siberia by reconstructing the forts and garrisoning them. And though this strategy met with large degrees of success the simple vastness of the regions in rebellion and the massive numbers of their rebels made for a difficult task.

Within the Komi Rebellion Lewenhaupt with the help of some Siberian Cossack officers realized the importance of the Pechora River to the rebellion. Thus he concentrated on conquering the river and its surroundings that way he could afford himself great degrees of maneuverability and deprive the Komi of it at the same time. And over several months he slowly managed to do just that as he ejected the Komi rebels from the settlements and strategic points of the river and established forts to monitor these seized points.

Further to the east Lewenhaupt's subordinates adopted the same strategy in regards to the Lena River. But the Lena River was even more extensive than the Pechora River and the Yakuts were even more populous than the Komi were. Thus the Swedes and Russians only succeeded in seizing the southern bends of the river during 1713 and 1714. During this process a young Saxon officer serving with the Swedish army, Hermann Maurice earned himself much acclaim for his brave actions and brilliant tactics. His most notable success yet is obviously his leadership of the successful cutting of the Siberian Highway between Yakutia and Kamchatka, which was home the Muscovy Company got supplies to Yakutia from Kamchatka. This earned him the attention of even Karl the Magnificent who was all the way west in Russia establishing and stabilizing Karl Fridih's tsardom.

The Muscovy Company has not fared well. In response to the Swedish and Russian assaults against the Komi they began to constolidate resources in the east. But when the bond between the Yakuts and Koryaks was broken by Hermann Maurice they found their resources split between two regions. And in Yakutia much of it has fallen into Swedish hands. However those resources in the Kamchatka have remaiend secured due to the difficulty of the Swedish thus far to make significant gains against the fierce Koryaks.

The success of the Swedes and the failure of the Siberians derives from a few different things. The Swedish have successfully brought to battle against the Siberians an organized, modern army of Swedes and Russians. This is the sort of force that has always been able to overcome the Siberians. The Siberians had been reliant on the Russians being disorganized and in the midst of a civil war for years to achieve success, but the Swedes ended the civil war and than made peace with Russia's other enemies so that they could focus on consolidating and crushing the Siberians. And though the Siberians have the numbers they lack the organization, the skill, and the amount of modern weaponry to defeat the Russians. Though they may last out several years before being completely vanquished.

The implications of the Swedish and Russian successes are significant. These victories, peaces, and general stabilization are solidifying Karl the Magnificent's hold on Russia and shoring up the image of Karl Fridih's reign as one of stability and peace. While they mean the Siberians' days are numbered, albeit that number may be large due to the ability of the Siberians to continue fighting for years in the frozen wastelands of Siberia's hinterlands. And for the Muscovy Company there is hope that they can save one of these rebellions or exchange the rebellions in return for some financial gain within Russia. Otherwise it may all be naught.

Summary of Events
  • Swedish army disperses across Russia
  • Swedes and Russians rebuild southern border defenses
  • Swedes and Russians stabilize Russia and suppress banditry
  • Swedes and Russians move to crush Siberian Rebellions
  • Pechora River and some other areas of Komi Rebellion fall to Swedes and Russians
  • Southern bends of the Lena River of the Yakut Rebellion fall to Swedes and Russians
  • Siberian Highway between Yakut Rebellion and Koryak Rebellion is cut
  • Koryak rebellion loses some territory but not a lot
 
Maratha War of Succession (A Charleville Execution - 1713/1714)

Maratha War of Succession
A Charleville Execution

Maratha soldiers and French company men

The previous years of fighting had seen the Maratha War of Succession intensify. The competition between the British East India Company, the French East India Company, and the United East Indian Company resulted in European soldiers, advisors, guns, and money going to both armies. Even though this occurred it did not offer either side, Shahu or Shivaji II, dominance in the war and instead Jadhav failed to take Dharwad and Tarabai failed to do much more than keep it. Yet the diplomatic efforts of Tarabai's allies succeeded in swaying the undecided Maratha princes in her favor and providing her with the tool that might allow her to finally end the war.

During the intermission of campaigns both sides developed their army further. The army of Tarabai saw a larger influx of European advisors and officers into its ranks accompanied by supplies. But further the French East India Company decided to send French soldiers to join Tarabai's army to both assure Tarabai's victory and prove to the Marathas that their greatest friends were in Paris not Amsterdam. While the army of Jadhav was reinforced by the British East India Company, but to a lesser extent than before as the company worried about placing too much of its interests in Shahu's claim.

The campaigns of 1713 began as Tarabai's army marched out of the fortress of Dharwad to the north. This army made its way towards Venugrama, where Shahu had made his temporary capital. However Jadhav had doubts about the aged walls of Venugrama being able to withstand a heavy siege from Tarabai's army. Most of the defenses had originally been constructed in 1519 and were not a suitable match for the cannon and siege tactics of 1713. Thus Jadhav chose to make battle.

The two Maratha armies would come together at a nullah of the Malaprabha near some nameless village. There Jadhav's army used the nullah as an anchor for his army that might prevent Tarabai's famed cavarly from routing his left flank. While on his right he concentrated his best soldiers and the British Company men as while as his elephants so that he might repulse Tarabai's army and then launch a counterattack that would shatter her army. Tarabai's plan was vastly simpler. She wanted to destroy as much of Jadhav's army with her artillery before overwhelming his flank and routing his army. Neither of these plans would go as planned needless to say.

The battle began as Tarabai and Jadhav's artillery began to exchange fire. The superior quality and number of Tarabai's artillery allowed her to suppress Jadhav's army in a greater fashion than Jadhav did hers. But the importance of the artillery exchange was trivial in comparison to what followed. Jadhav had advanced to the front to rally the army which was wavering at the strength of the cannon. There he would be struck by a volley from loyalists equipped with French muskets. In his dying moments he commanded that his son Chandrasen take command. In contrast Shahu (in the rear) commanded Balaji Vishwanath to take charge. Chaos seized the army as the generals issued differing orders.


When Tarabai was involved that a man had fallen from Jadhav's howdah she chose to seize advantage of whatever temporary discord emerged and ordered a full on assault against the flank of the enemy army. The combination of the size and force of this assault and the confusion of the command of Shahu's forces produced an absolute triumph for Tarabai. The army of Shahu was completely routed and fled the field in disorder. Even the British company men were broken by the battle.

In the aftermath of the battle the cause of Shahu crumbled. Chandrasen Jadhav took offense at Shahu appointing Balaji to the command of the army and blamed them for the defeat. Further he defected to the army of Tarabai with a significant amount of remaining army. He was followed by several others. The few who stayed by Shahu's side were led by Balaji Vishwanath. And it was him who was expected to rebuild Shahu's army and succeed where Dhanaji Jadhav had failed. The optimism that Vishwanath could accomplish this quickly evaporated for Balaji was assassinated by men hired by his old rival Chandrasen.

With Vishwanath dead, the army scattered, and Tarabai closing in Shahu was finished. In the waning days of his rebellion even the British East India Company abandoned him to his fate. And the Mughals, who did not want war with Marathas, dropped him as well. Finally the last of his generals would accept an extremely generous bribe from the French East India Company and sell Shahu to them. They then presented Shahu to Tarabai as a gift to further cement their position within the Maratha Empire.

At sea the British East India Company attempted to blockade the Maratha Empire's coast. Yet the small number of the British East India Company's fleet and lesser caliber of it in comparison to the Maratha navy meant that there was no chance of success for this venture. Instead of any successful blockade the British East India Company's fleet was dealt a series of humiliating naval defeats from the Maratha navy. All of which served to diminish the strength and prestige of the British East India Company at sea.

The failure of Shahu's cause can be attributed to many things. Obviously the lost of Jadhav in a crucial point of a major battle and the resultant chaos played a large roll in crushing the cause of Shahu. But the reasons for defeat extend past that. Firstly the rivalry between Chandrasen and Balaji was just one of many rivalries within the emerging court of Shahu that damaged the unity and leadership of Shahu's army. But also the lesser size and quality of the army of Shahu meant that even had Jadhav remained alive and had he suppressed the internal divisions of his army he would have struggled to defeat Tarabai. Especially as he did not have many fortresses that could withstand the army of Tarabai and sustain his army. Finally the increasing support of the French East India Company for Shahu added to the many difficulties that Shahu faced. And for the British East India Company's fleet they made the assumption that the civil war had weakened the Maratha Empire to the extent that they might defeat the mighty Maratha navy.

The implications of Shahu's defeat are great. Firstly Tarabai has cemented her place at the head of the Maratha Empire and her son's position as Chhatrapati. Secondly the influx of European weapons and military ideas has sparked a transition towards more western styles and methods among the Maratha military. Which the Maratha hope will aid them in any coming wars with the Mughals. Menwhile the French East India Company's large role in the Maratha victory has secured them a share of the spoils of victory, nothing to the extent that the British managed in the Mughal Empire, but something profitable and influential. The same, but in a lesser fashion, in regards to the Untied East Indian Company. Lastly the naval defeats suffered by the British East India Company have served to weaken its naval presence and have been cause for rebukes in London. However the vast influence and power of the Company for the most part is unchanged by the loss of Shahu.

Summary of Events
  • Both armies develop more
  • French actively support Tarabai
  • Tarabai marches north and Jadhav meets her near Malaprahba river
  • Jadhav is killed and Tarabai wins massive victory
  • Many, led by Chandrasen, defect to Tarabai from Shahu
  • Vishwanath takes charge of Shahu's war effort
  • Vishwanath is assassinated by Chandrasen
  • Shahu's cause crumbles completely
  • BEIC abandons Shahu
  • Mughals abandon Shahu
  • Shahu is betrayed and sold to the French who give him to Tarabai
  • BEIC tries to naval blockade the Maratha Empire
  • BEIC fleet is humiliated by Maratha navy
 
Saxon Succession Crisis (A Brewing Storm - 1713/1714)

Saxon Succession Crisis
A Brewing Storm

Frederick Augustus II

The election of Elector Frederick Augustus to the Polish throne was cause for difficulties in securing the Albertine Wettin line. At the point of his election Frederick Augustus had but a single legitimate child, his son Frederick Augustus II. And when he chose to move to the Polish-Commonwealth his wife refused to follow him. Instead she insisted upon staying in Saxony which had become her home over the years. This Frederick Augustus allowed, because he was more then willing to abandon his wife for a number of younger, more attractive women. Thus come Frederick Augustus I's deposition there was but a single Albertine Wettin left, Frederick Augustus II.

This fact was cause for worry among the courts of Germany and Europe. Saxony as an electorate was an important piece of the fabric of European diplomacy and German politics. Thus its succession of lack there of was of great import. And almost immediately bickering broke out over who was Frederick Augustus II's heir. The number of claimants was in the tens if not hundreds, but of those who were serious there were far fewer candidates.

The most serious and most likely claimants were of the Ernestine Wettins. At the start of Frederick Augustus II's regency, their line contained eight claimants alone. Those claimants being Henry of Saxe-Römhild, Christian of Saxe-Eisenberg, John Ernest of Saxe-Coburg-Saalfeld, Bernhard of Saxe-Meiningen, John William of Saxe-Eisenach, Johann Ernst of Saxe-Weimar, Ernest of Saxe-Hildburghausen, Frederick of Saxe-Gotha-Altenburg. A vastly confusing array of Johns, Ernests, and other names from Saxe-somewhere.

However the number of Ernestine Wettins soon declined to a smaller number. Christian of Saxe-Eisenberg died in 1707, his own succession disputed by his brothers. He was followed by one of them, Henry of Saxe-Römhild, in 1709, his succession also disputed by his remaining brothers. The of the last six claimants two (Bernhard of Saxe-Meiningen and Ernest of Saxe-Hildburghausen) died to be succeeded by their sons who continued to press their claims. The others though remained.

Within the Ernestines the best claimant was John William of Saxe-Eisenach as his branch was most senior of the Ernestines. However his relative youth in comparison with four of his kinsmen was exploited by them to make out teir own claim. But of those elder kinsmen one, Ernest of Saxe-Hildburghausen, was heavily indebted and not expected to be able to mount much of a challenge. The three other elder kinsmen ( Johann Ernst of Saxe-Weimar, John Ernest of Saxe-Coburg-Saalfeld, and Bernhard of Saxe-Meiningen) however were determined to secure Saxony. And the youngest kinsman (Frederick of Saxe-Gotha-Altenburg) proved another issue entirely due to his ties with France.

And to further expand on the issue of the various claims of the Ernestines there was the issue that it was typical for the inheritance, within the Wettin family, to be split among all or most claimants. Which is why there were so many differing versions of Saxe. And as a result even if a claimant could not secure the title of elector they could very well demand a valuable piece of the electorate based off historical precedent. All of this made the Ernestine claims alone a twisted set of geneologoly and precedence. And that is just the male line of Ernestines, there is also a multitude of female lines that further complicates everything.

This potential chaotic succession prompted the Brunswicker, Prussian, and Mainz protectors of Frederick Augustus II to move as swiftly as they could to marry off the young elector. Thus in 1714 a suitable match was made between the elector and the young Fredericke Charlotte of Hesse-Darmstadt. Both were youthful, but marriages at their young age were not uncommon within Europe, especially with such an important succession at risk. So the two would marry in the fall of 1714.

Summary of Events
 
Plague of 1707 (After the End: Central Europe & The Baltic - 1715/1716)

After the End: Central Europe & The Baltic


-Frost fairs, like what became popular in Britain in this era, were fairly widespread during the Great Winter.

The Plague of 1707-1712 had become the deadliest European plague epidemic in recent history. Although the disease as a whole had become a regional rather than a continental threat after the Great Mortality of the medieval period, the plague in all its varieties still occasionally cropped up in Europe: cutting a deadly swathe through cities and even whole regions as it had done many times in the 17th century. Many large European cities such as Seville, London, and Vienna recorded devastating outbreaks of the plague in the past century. In London alone during the Great Plague of London in 1665, at least 100,000 people, a quarter of the city's population, were killed by the plague. The story was much the same in other major cities of the time. And yet, for all the terrible devastation the plague had caused in London, in Vienna, in Seville, and now in Central Europe, these plagues were ultimately destined to be the last recorded plague outbreaks in these cities. The plague would never again ravage Europe as it had in the Middle Ages, for many countries and cities, the period of the 17th and 18th century would ultimately be the last recorded instance of plague in their history. It had not left Europe entirely, and periodically resurged in individual cities and regions over the years, but the Plague of 1707-12 would ultimately be Europe's last major regional plague outbreak.

The reasons for the plague's disappearance were puzzling, even to later generations. Scholars of the era, learned men from all over Europe, gave a wide variety of speculated causes: some believed that the European populace had become resistant to the plague in the same way children often became resistant to ailments such as measles if they had had them and survived. Other scholars of the era believed the causes had to do with improvements to sanitation and housing. The widespread belief was that sickness was caused by "miasma" or bad air that afflicted whole areas and that the best way to deal with it was to leave affected regions or build cities and towns in such a way that would allow the bad air to dissipate: wide streets, buildings that were spread out and well-spaced rather than squalid and cramped. This belief led to the widespread adaptation of such practises in urban construction during the course of the 18th-century. Many also speculated that diet played some role in the decline of the plague in this period: it was understood that a well-fed man was more likely to survive illness than a starving one, so many concluded that expanded access to food and better nourishment for the poor was the key to the plague's decline.

Although the plague was now gone from Central Europe proper, its visitation had been devastating. As many as 200,000 people may have died from the plague, though an accurate estimation would never be fully known. Major centres of commerce such as Warsaw, Krakow, and the city of Poznan had been hit hard by the plague, contributing many of the hundreds of thousands of deaths that were ultimately recorded in Central and Eastern Europe after the Great Eastern War.

However, while the plague was only regionally-devastating, the Great Winter of 1708 had caused the remainder of the region and beyond to come tumbling down. Regions that had avoided the plague by careful containment or sheer fortune were hit by the Great Winter like the blow of a hammer. The frost killed crops in their fields, animals on farms and in the forests, and froze rivers and seas to solid ice. The region plunged into famine: no food could be grown, nor could it be transported from regions of plenty to regions of deprivation as was common practise during a famine. The death toll of the Great Winter made even the terrible plague pale by comparison as hundreds of thousands died throughout the continent and Central Europe, already known for its bitter winters, was hit harder still. The winter brought a brief respite from the plague, but as soon as the Great Winter ended, the plague returned in force and would ravage the region. The death toll, as a result of both calamities put together, was probably somewhere around 400-500,000 people throughout the Baltic and Central Europe, excluding Eastern Europe and Russia in particular. Although the Great Winter ended after merely three months, the plague would last until it had more or less ended completely by 1712: when all cities and towns throughout the region were officially declared free of the plague, the bodies of plague victims that had frozen during the winter were slowly, painstakingly gathered and burned throughout the region from the smallest villages to the largest cities. This policy in future decades would be widely credited with preventing the resurgence of the plague in Central Europe.

Central Europe's harvests would, similarly, recover as well. Layers of ice that had frozen the seas finally thawed and trade flowed in abundance throughout the Baltic once again. Meanwhile, new harvests were planted just as soon as the land could take them and merchant ships from all over Europe poured into the Baltic with shipments of grain and potatoes to be sold for enormous profits. Even with their depleted treasuries, no state could afford to turn away shipments of foodstuffs, no matter how high the cost. Although the prices were high, this also spurred the restoration of trade in the Baltic and swiftly reintegrated the trade-starved region into European commercial networks. Moreover, with regional wars at an end, there were more farmers than ever before available to plant harvests: something sorely needed after years of depletion from the plague and the famine from the Great Winter.

The consequences as a whole were dramatic in Central Europe. Lands that had been decimated by famine and disease were often left fallow and unsettled, causing a great migration of peoples throughout the region. In the Duchy of Posen, Protestant Swiss immigrants, as well as Prussian farmers began settling empty lands, encouraged by favourable royal decrees that encouraged this exact practise. With their labour forces depleted by plague and famine, Polish elites in the region not only accepted this influx of new farmers but often welcomed them as a way to replenish the region's depleted economy and restore trade. Though many saw these new migrants as a potential threat in the long-term, in the short-term they simply had no realistic alternative, and thus both Swiss and Germans alike were seamlessly integrated into the Duchy of Posen. In Sweden, migrants who were either seeking opportunity or fleeing chaos elsewhere came to the Baltic cities of the Swedish Empire in great abundance: bolstering the populations of cities such as Reval which was fast emerging as one of the biggest centres of trade in the Baltic. The Prussian city of Danzig saw a similar phenomenon, as Danzig was a major port of entry for trade and mercantile commerce in the Polish-Lithuanian Commonwealth.

The Commonwealth had seen a reorientation of its internal balance of power: Polish aristocrats stripped of many traditional lands and privileges after the end of the Great Eastern War were hit hardest of all by the Great Winter, forcing many of them to either sell their lands or go into debt to the Lithuanian magnates, who were traditionally supporters of Charles XII: who had allied with them against Augustus the Strong.

As a whole, Central Europe was rebuilding and its populations were recovering from war, famine, and plague, but it also called into question certain political and economic arrangements that had long predominated in the region, planting the seeds for future tensions...

Results:
  • Central Europe as a whole is rebuilding at a fast pace from the deprivations of past years.
  • However, the depletion of local populations allows widespread settlement by Protestant migrants from Germany and Switzerland in the Duchy of Posen and along the Baltic coast.
  • Lithuanian magnates gain a decisive economic advantage as a result of the destitution of Polish elites, many of whom are indebted to Lithuanian creditors to stay financially-solvent.
  • Central Europe is recovering rapidly: economically and demographically regenerated by internal migration, but this will no doubt produce consequences for the region in the future.
 
Morroco-Venetian Treaty of Commerce (1715/1716)

Morroco-venitian treaty of commerce


The Morrocan ambassador at the court of the Doge
- Venice shall grant a (medium) reduction in tarifs to Morroco
- Venice shall be granted a trade quarter in the the city of Tetouan in exchange for a (small) annual fee
- Venitians in Morrocan territory shall be granted freedom of worship but will be under strict interdiction to proseletise
- Similar rights will be accorded to Morrocan in venitian territory as long as their worship remain private
- Morroco will send an ambassador to Venice
- The leader of the venitian community in Morroco shall be granted ambassadoral rank and duty

Signed by:

(X) The Pasha of Agadir for the Sultanate of Morroco
(X) Alvise II Mocenigo, Doge and representative of the Great council for the Serene Republic of Venice
 
Back
Top